Month: May 2022

  • Review: WEN 56235i Generator for Pop-Up Camper Boondocking

    Review: WEN 56235i Generator for Pop-Up Camper Boondocking

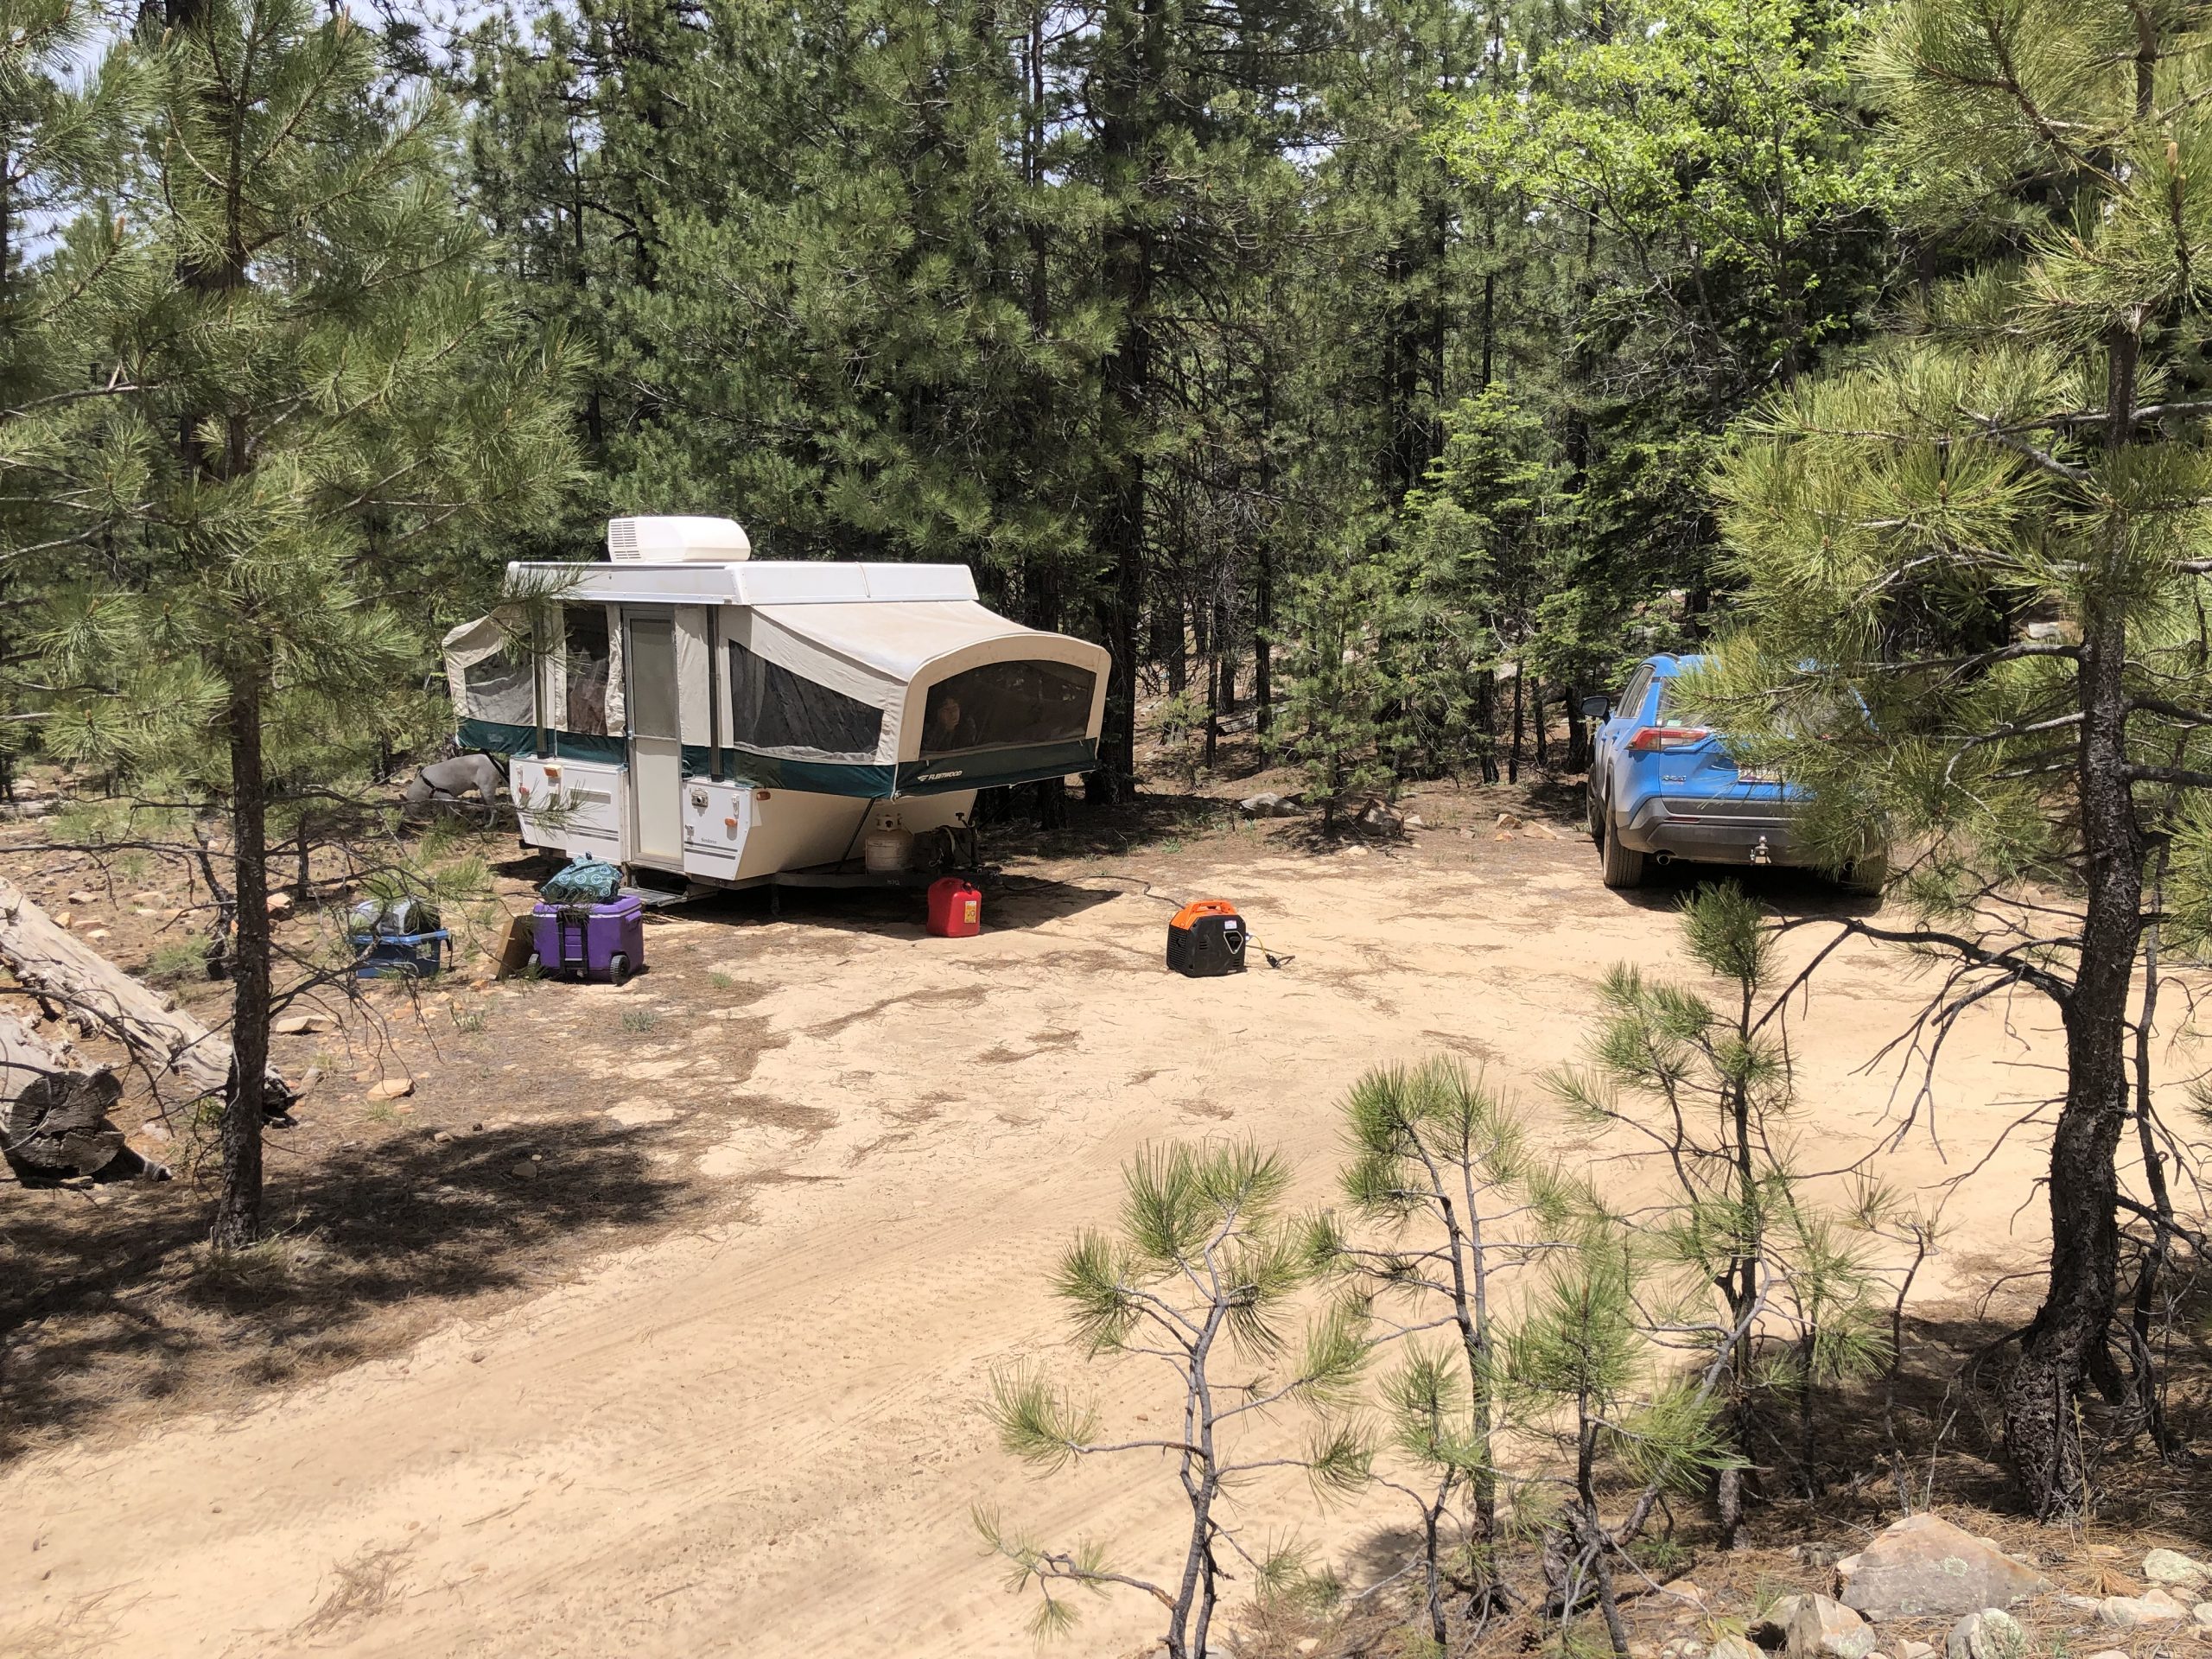
    When we bought our pop-up camper (a 2007 Fleetwood Sedona), we knew that we wanted to go off-grid. We have no interest in camping in parking lots surrounded by others people.

    But we live in Arizona and have two dogs, which means that AC is a necessity. We considered solar setups, but I’ve done that in the past and wasn’t satisfied. Solar panels are expensive and you need a lot of them to power AC. You’re also limited by the available sunlight, which is hard to predict.

    We decided a generator would be the best option for us, but there are many on the market to choose from. In this article, I’ll explain why we chose the generator we did and give my thoughts on how we like it so far.

    Choosing a generator

    The first step when selecting a generator is to determine how much power you’ll need in watts. We had to potentially provide enough power for:

    • Air conditioning (13,500 BTU unit)
    • 12V system charging (for interior lighting and propane furnace blower/ignition)
    • A corded drill for the lift mechanism (more on this in another article)
    • Phone charging and another miscellaneous stuff

    We wouldn’t need to use any of those simultaneously, which meant that we just had to accommodate the most power-hungry item: the AC unit. That uses around 1,400 watts while running, so we needed at least that much.

    Generators have two specifications: surge watts and running watts. In our case, we needed at least 1,400 running watts. Theoretically, the AC unit could draw as much as 6,500 surge watts while starting, but we haven’t found this to be an issue.

    It is tempting to just get a large, high-output generator like this one. Models like that are quite reasonably priced. But they’re also large, very heavy, and use a lot more fuel. We have limited space in our camper and wanted to keep fuel consumption as low as possible, to reduce the amount of fuel we had to bring with us.

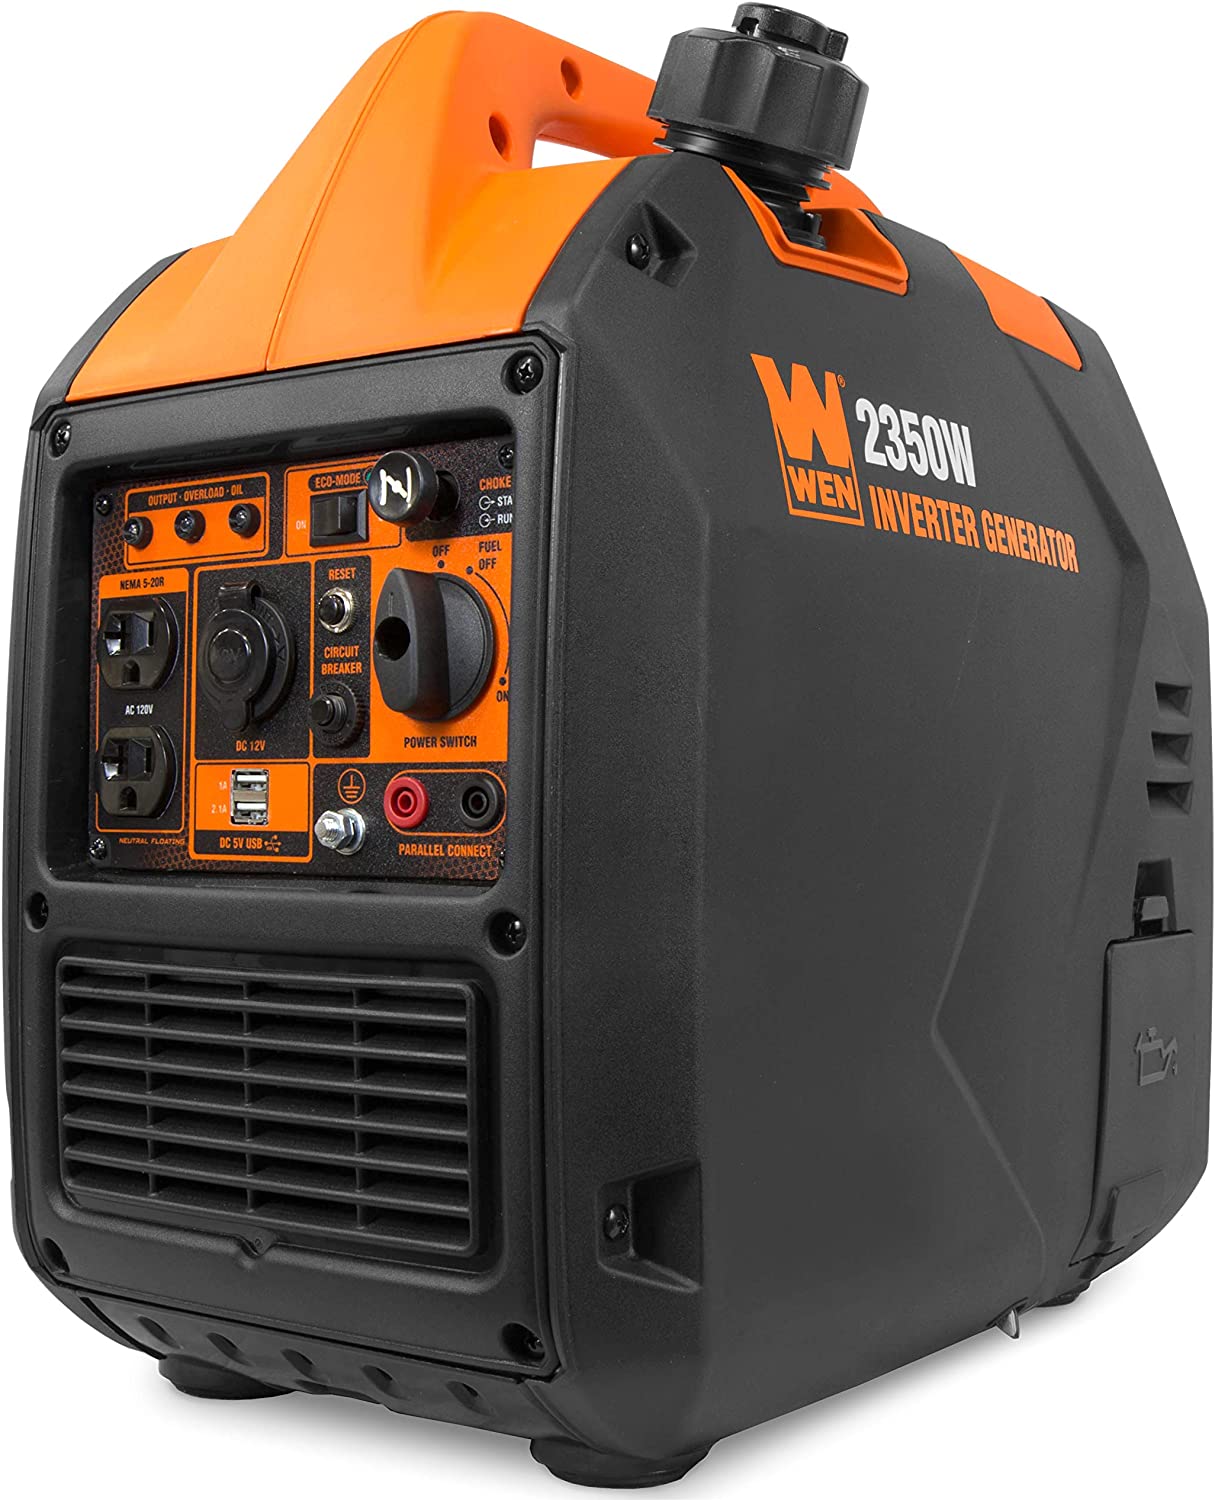
    The WEN 56235i inverter generator

    Ultimately, we settled on the WEN 56235i inverter generator (rated at 1,900 running watts) It is a portable model with a built-in carry handle that is quite compact and fuel-efficient. It weighs just 39 pounds, compared to 104 pounds for the Westinghouse WGen3600DFv. It was also pretty affordable.

    Pop-up camper with Wen Generator

    The WEN 56235i is not a dual-fuel model, which means it only runs on gas. We would have liked the option to use propane too, but the dual-fuel models in this form factor are much more expensive. On the plus side, the WEN 56235i is very efficient. Wen claims that its 1-gallon fuel tank will last for seven hours at half-load.

    We haven’t yet tested the real world fuel consumption, but I estimate that the fuel tank will last around 5 hours while we run the AC. With the generator’s tank full and an additional 5-gallon gas can, that gives us 30 hours of runtime. We could run it nonstop from 11am-6pm everyday (keeping the dogs cool) and get four full days of use before needing more gasoline.

    Opinions

    My only real complaint about the WEN 56235i generator is that it is fairly loud. It might not be any louder than other generators, but it is still loud enough to be a nuisance. This isn’t a major issue for us, as we have no reason to run it at night and don’t camp near other people, but it is still something you should be aware of.

    Startup is very easy (make sure nothing is connected to the generator when starting!) and the engine runs smoothly. You do have to ensure that it has oil, because this isn’t a car engine and it will burn oil. We bought a handful of bottles of oil to keep in our camper so we could top it off when needed.

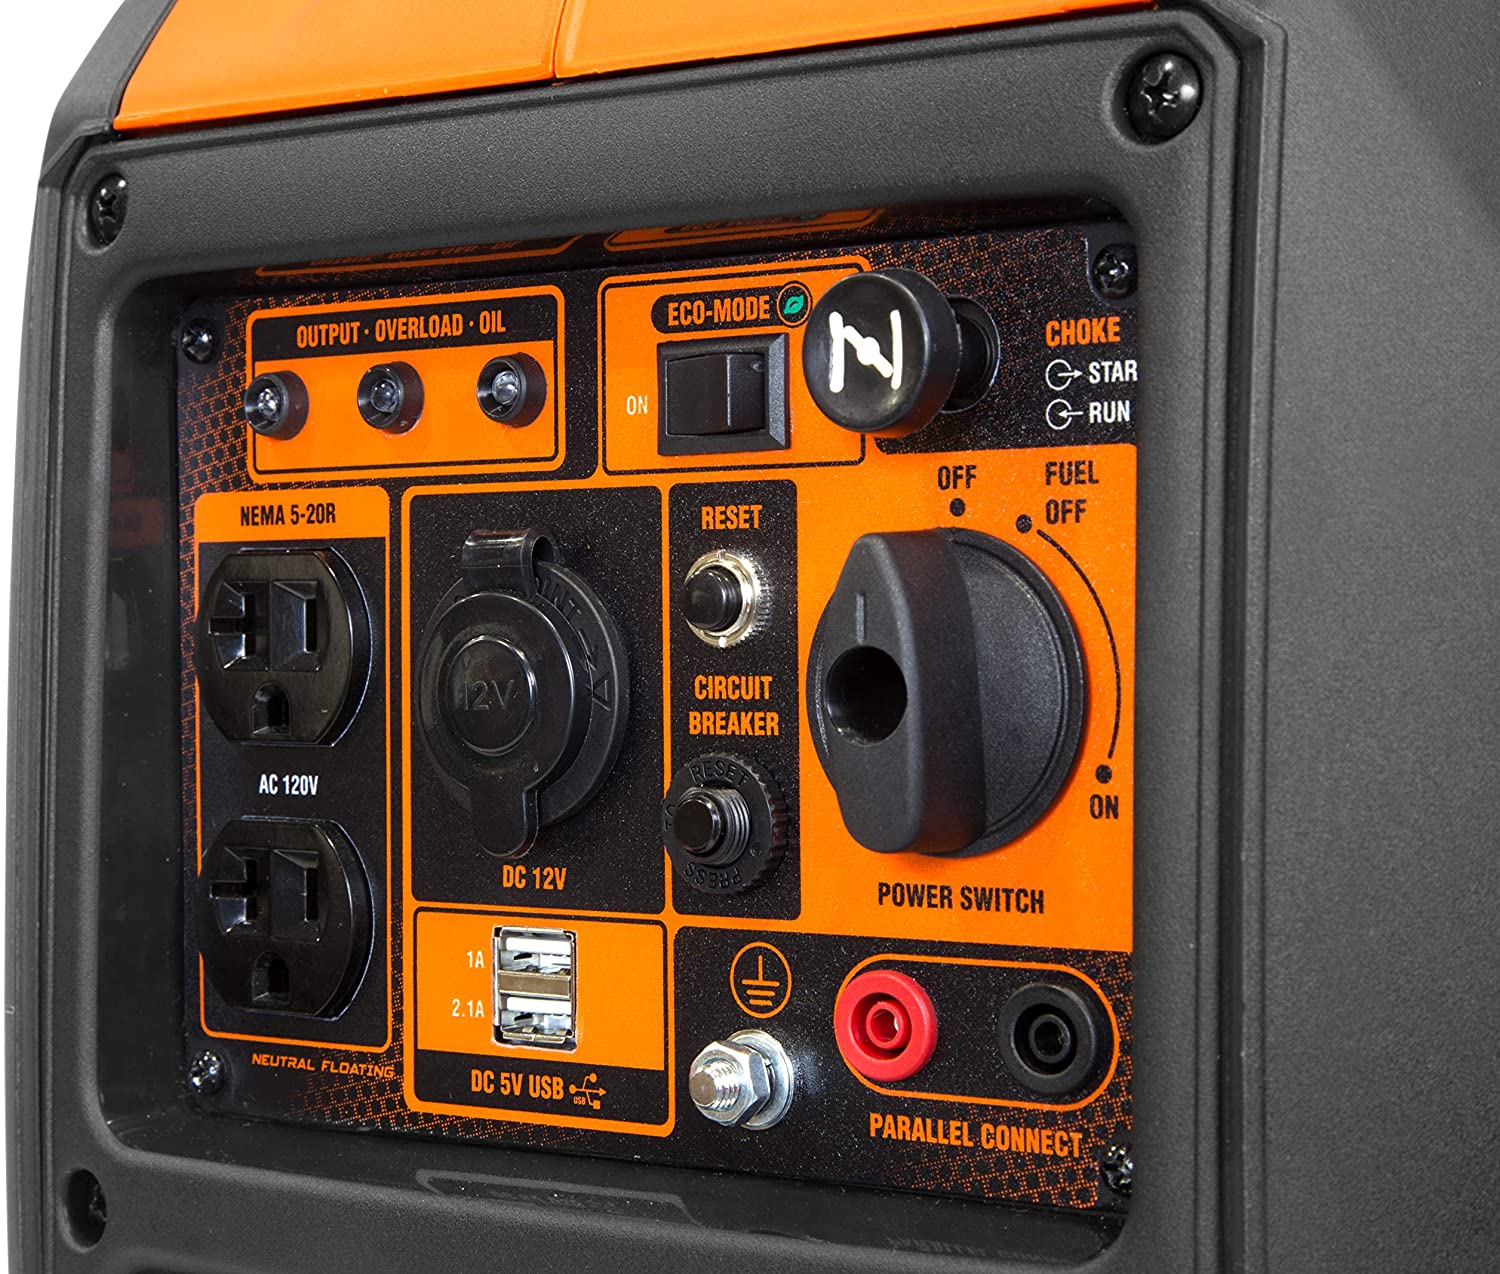
    The available power outlets work well for us. There are USB ports for charging our phones and other gadgets. There is a 12V DC receptacle if you need it (we haven’t had a use for it). And there are two 120V 20A outlets, which is what we use for the camper via this adapter.

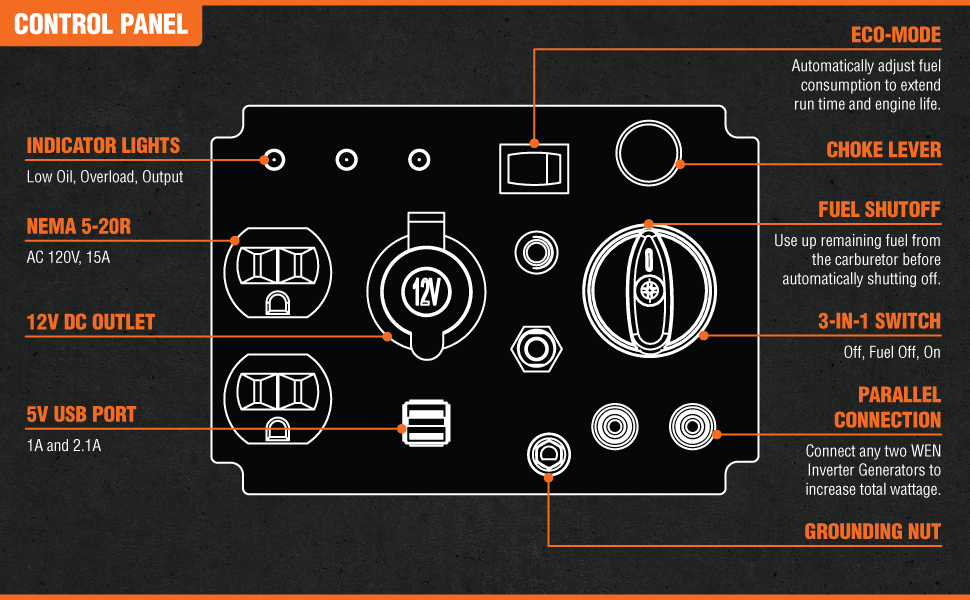
    One nice feature of the WEN 56235i generator is the “Eco-Mode” switch. Flipping this switch will allow the generator to adjust itself to suit power draw. In the manual, Wen says to only use Eco-Mode if you’re drawing less than 1,000 watts, so it doesn’t help with the AC. But it is great for saving fuel when all you need to do is charge a phone or something.

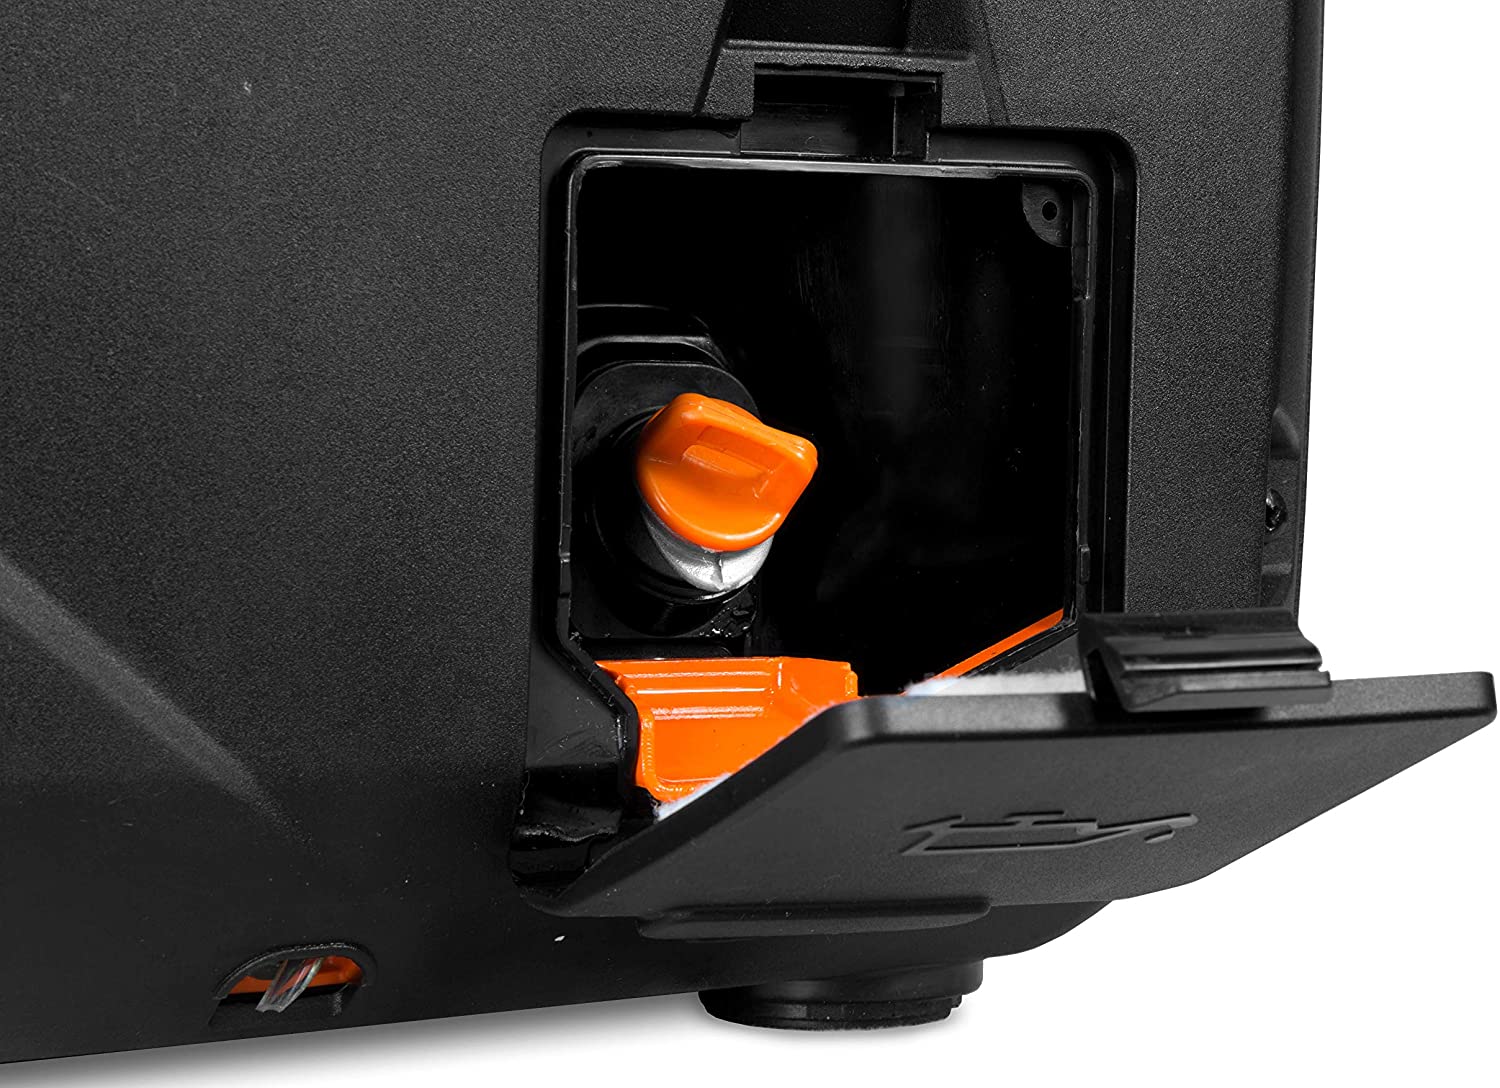
    The power switch also has a handy feature that lets you cut off the fuel supply while the generator is still running. This burns off the fuel in the carburetor, which should keep it from getting junked up and therefore extend the generator’s service life.

    Finally, there are connections that let you daisy chain generators together to increase the power output. We don’t have any plans to use that feature, but it is a nice option if we ever wanted to get a second generator to power our home in an emergency situation.

    Conclusions

    There are lots of similar generators on the market and I can’t tell you if this is the best one. But I can tell you that we’re very happy with our purchase. I chose this model because I’ve always liked Wen’s tools and the price was right. Plus, I’m a sucker for the color scheme (don’t judge me).

    I would absolutely recommend the WEN 56235i generator to anyone in a situation similar to ours. It provides a little more power than we need, but it is still compact, easy to carry, and fuel-efficient. In my book, that makes it perfect for boondocking in a pop-up camper.

    If we ever run into any issues with our generator, I will update this page.

  • What You Need for Your First Motorcycle Trackday

    What You Need for Your First Motorcycle Trackday

    While I’ve been riding motorcycles for more than 16 years now, I didn’t go to the track until I bought my Daytona 675 this year. A big part of the reason that I waited so long was that it seemed intimidating. I was overwhelmed by what I needed to do and buy, which held me back.

    Now that I have a couple of trackdays under my belt, I know that it is actually pretty easy to get started. To help others get on the track, I want to explain what you need for your first motorcycle trackday.

    Bike prep

    This should be obvious, but you should make sure your bike is well-maintained and in good working order before you do anything else. Your trackday organizers will inspect your bike and they won’t let you on the track if there is anything wrong with your bike. Things to check include:

    • Fork seals are clean and not leaking
    • Chain and sprockets are clean, lubed properly, and not overly worn
    • Foot pegs are secure and pivot properly (if applicable)
    • Throttle closes smoothly and easily
    • Brake and clutch levers operate properly and cables aren’t loose
    • Shifter moves freely
    • Brake pedal has proper resistance and doesn’t bind

    Your suspension and tires should also be in good shape. If you are in need of new tires or need your suspension setup for your weight, there should be techs at the track who can do the work at competitive rates. It cost me $40 to have a tech setup my suspension at the track and tire prices were the same (or better) than at local shops. The techs can also recommend tire pressures for your bike and the current conditions.

    Assuming that your bike is in good shape, there are only a few things you need to do before you get on the track. These vary by track and trackday organization, but usually you need to:

    • Cover all lights with blue painters tape
    • Either remove mirrors or cover the glass in painters tape
    • Install a dB killer for your exhaust, if necessary

    Many tracks have decibel limits and your exhaust can’t exceed those limits. Even popular aftermarket slip-ons can be too loud. Unless you have a stock exhaust, there you may need to install a dB killer to stay below the limit.

    Some exhaust manufacturers sell dB killers/baffles specifically for their products, which should be your first choice. If those aren’t available for your exhaust, you can try a universal dB killer like this one.

    Riding gear

    Every respectable trackday organization will have gear requirements. Your textile jacket for street riding will not cut it. At the very least, you will need:

    • A DOT-approved helmet
    • Riding suit (leathers)
    • Over-the-ankle riding boots
    • Gauntlet gloves

    Riding suits can be made from a variety of leather types, including cow hide, kangaroo hide, and goat hide. Cow hide is always acceptable, but the others may not be (check with your organization). Similarly, a one-piece suit is always acceptable, but a two-piece may or may not be. If you are going to buy a two-piece suit, make sure the top zips onto the bottom.

    Your suit may come with knee pucks (sliders) and a back protector, or you may need to order them separately. Whether or not they’re required will depend on the organization, but you should buy them either way.

    Wearing my inexpensive Bogotto Losail riding suit

    Suits can be very expensive and that cost tends to be what keeps people from going to the track. But a riding suit will literally save your skin and decent suit will last for years. I ordered my suit (a Bogotto Losail) from FC-Moto in Germany for around $300, which is about the cheapest suit on the market. But it is still cowhide and seems to be constructed well.

    And whether you’re in cold weather or hot weather, base layers will increase your comfort. Under Armor-style leggings and shirts are great at wicking away sweat and keeping your from sticking to your leathers. The cheap brands are generally just as good as the expensive brands, so there is no need to spend a lot of money.

    Tools and supplies

    To be on the safe side, you should bring a basic set of tools with you. Those should include ratchets and sockets, hex wrenches, pliers, and so on. You don’t need to bring your entire garage with you, but you want to be able to handle basic tasks if they come up.

    You will also want to bring an air compressor and some means to power it. I use this air compressor that plugs into my car’s cigarette outlet. With this, I can inflate or deflate the tires to maintain the pressures recommended by the techs. Keep in mind that your tire pressures will change throughout the day as it gets hotter.

    Depending on the track and the size of your bike’s gas tank, you might also need to bring a jerry can full of fuel. My Daytona 675 has a relatively large tank that lasts the entire day, but I have friends who need to refuel multiple times during the day.

    Shade and comfort

    You’re only going to be on the track for a fraction of each hour. The rest of the time, you will want somewhere comfortable to rest. The track might not have any amenities aside from some porta-johns, so you will want to bring a few things. This is especially true if you’re somewhere hot, like I am in Arizona.

    The most important thing is some shade. I use an E-Z Up Ambassador portable canopy. It’s heavy, but provides 10×10 feet of shade and is quick to setup/breakdown. To keep it from blowing away in the wind, you’ll want some sandbags to put on the feet. I just bought some bags and sand at my local Ace Hardware.

    Bring your own shade, because the track may not have any!

    You’ll also want something to sit on in the shade. Regular old collapsing camping chairs work just fine for me.

    It’s optional, but you might want a folding table on which to place your helmet, gloves, etc. between track sessions.

    Finally if you want some real comfort, you might consider a portable swamp cooler (with generator for power). I have friends who brought one to our most recent trackday and it really helped with the 105°F+ heat.

    Hydration and food

    I can not stress enough how important hydration is at the track. However much you think you’ll drink, double or triple it. I’m talking about gallons of water and/or sports drinks. Even if you aren’t in hot a desert like I am, the physical exertion of riding hard while in leathers will drain you.

    You should start hydrating several days before you go to the track. Avoid booze and drink as much water as you can stand each day.

    Then bring as much fluid as you can with you to the track. A few bottles of Gatorade will not be enough. I would recommend a few gallons of water for each person, at a minimum. You can buy electrolyte packets to mix in with your water (I use Liquid I.V.), which can help a lot. Make sure you have a cooler and ice to keep your water from getting hot.

    You will also want food for the track. While you might not have much of an appetite, you should have lunch and snacks ready. Bananas are great, as the potassium can help with cramps. Sugary candy can also help to keep your blood sugar up.

    Getting your bike to the track

    You can simply ride your bike to the track, but not many people do. That would make it very difficult to bring everything mentioned above. I can also guarantee that the last thing you’ll want to do after a long, hot day at the track is hope back on your bike for a ride home.

    For those reasons, you’ll probably want to tow your bike to the track. In the United States, U-Haul is a great place to rent motorcycle trailers. It usually costs me about $35 for a two-day rental, which lets me load the bike up the day before the trackday and then return the trailer the day after.

    My Daytona 675 ready to go to the track

    Just about any vehicle can pull those trailers. I tow with a 2019 Toyota Rav4 that has a towing capacity of 1,500 pounds and don’t have any issues. Just make sure you have an appropriately-rated hitch, a 2″ ball, and a 4-pin trailing wiring harness.

    The trailer will not come with any straps to secure the bike, however. The best method for tying down the bike will depend on the model/style. For a fully-faired super sport like my Daytona 675, I would recommend two heavy ratchet straps, two cam-lock straps or ratchet straps, and two “softloops.” This kit on Amazon has everything you’ll need.

    The two softloops can go around your handlebar grips. On each side, a ratchet strap should go from the softloop to the D-ring on the trailer. At the back of the bike, use a ratchet strap or cam-lock strap on each side from the passenger peg mount to the D-ring on the trailer.

    If you’re unfamiliar with tying a bike down to a trailer, check out this video that covers the basic concept:

    And that’s it! If you follow those steps, you should be well-prepared for your first trackday. Have any additional questions or tips you want to share? Comment below!