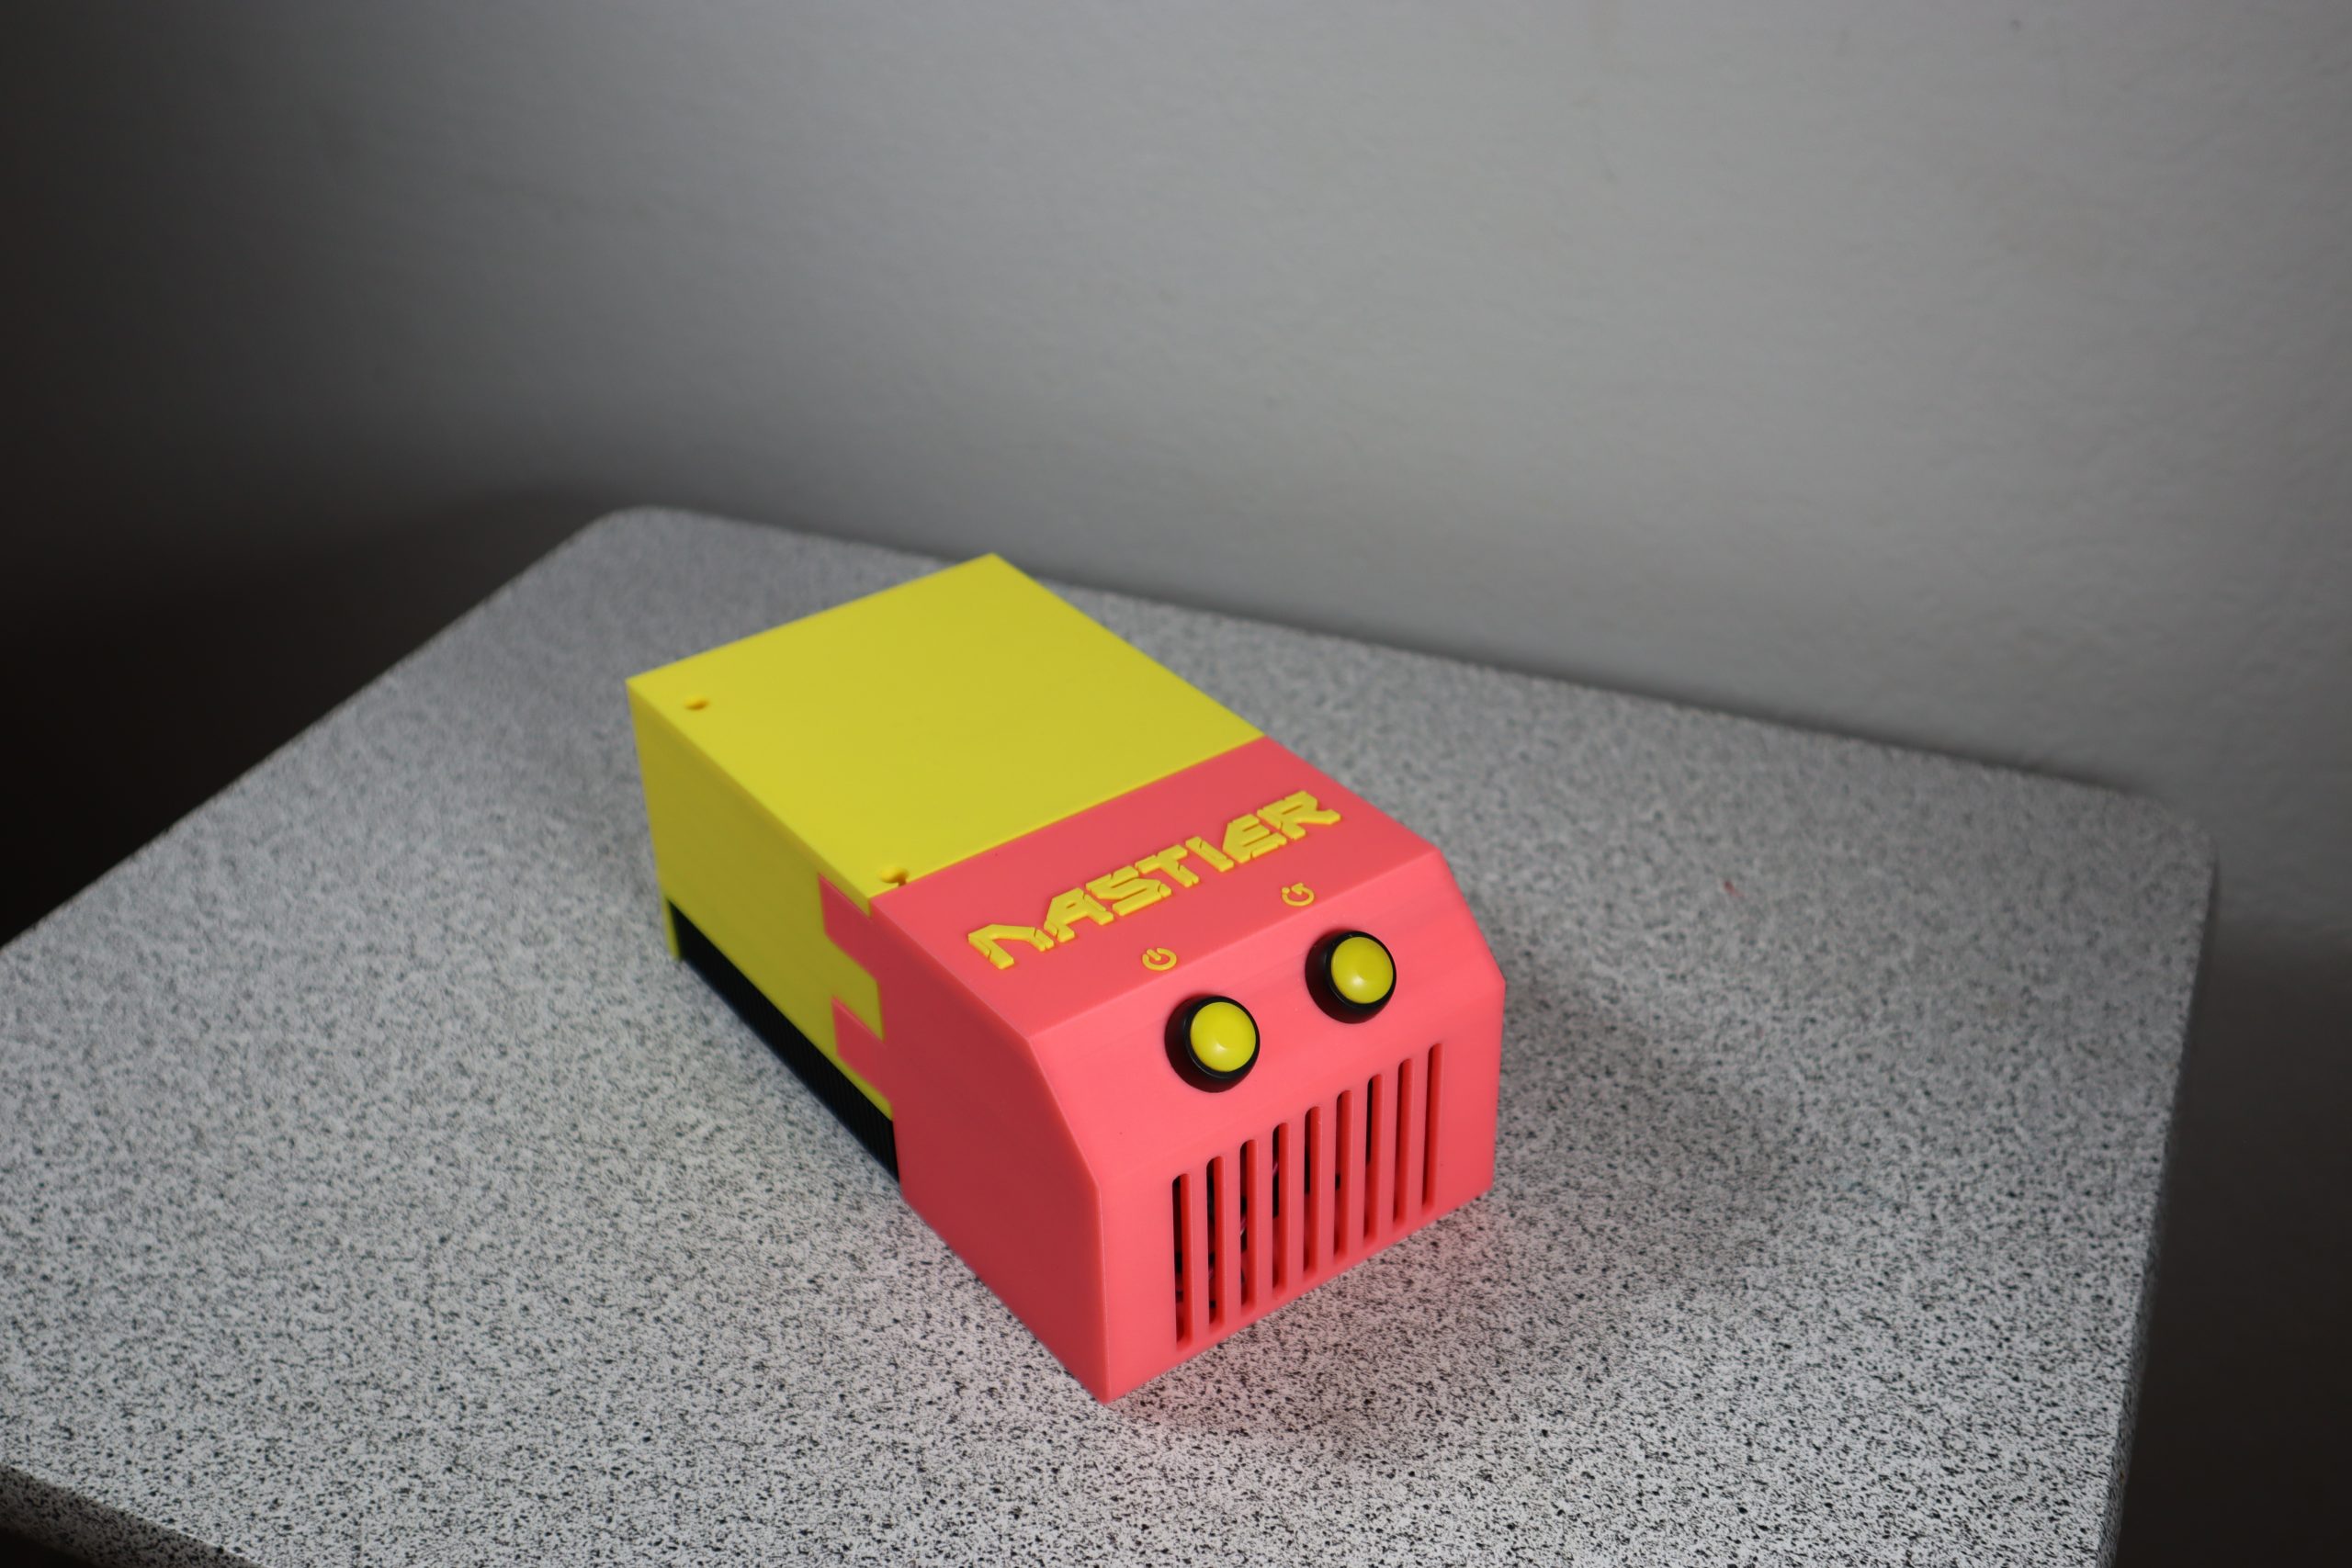
NASTIER (Network-Attached Storage; Tiny; Inexpensive; Easy; Redundant)
A ZimaBlade-based micro NAS with redundant Raid 1 storage and full server capabilities.
Parts:
- ZimaBlade w/ power supply, Y SATA cable, aluminum heat sink/base
- Fanxiang S102 Pro 1TB 2.5″ SSD SATA (x2)
- 12mm (1/2″ mounting) momentary push buttons (x2)
- 3D-printed enclosure
Overview
The folks at ZimaBoard sent me their new ZimaBlade “single-board server” to review for Hackster.io and I needed a project to test it out. NASTIER is the result!
This is a compact, self-contained NAS (Network-Attached Storage) device with Raid 1 redundant SSD storage. It contains two 1TB SSD drives, which means NASTIER provides 1TB of space (since the drives are mirrored). That’s plenty of storage and the redundant backup gives peace of mind.
You can also use NASTIER (and the ZimaBlade in general) for a lot more than just storage. It is a complete server with fairly decent processing power, so the sky is the limit.
I’ll start by showing you how to assembled NASTIER, then I’ll walk you through setting it up for redundant storage (complete with automatic syncing).
Assembly
Before following these steps, you’ll want to 3D-print the two halves of the enclosure. Files are available on Instructables here.
Step 1:
Start by disassembling the case the ZimaBlade comes in. You do that by bending the sides (where the ports are) up and out.

Step 2:
Remove the two screws holding the transparent cover in place.

Do not remove the other two screws that hold the board onto the metal base! That metal base is the heat sink and we’ll be keeping it attached.

Step 4:
Put the the board and heat sink into the back half of the enclosure. The ports should fit into their respective holes.

Then use the two screws you removed earlier to attach the enclosure to the heat sink threads. The holes should be big enough for eyeglass-style screwdrivers.

Step 5:
Attach the two SSDs to the ZimaBlade using the Y cable provided.

Then slide the drives into the slots.

Step 6:
Solder jumpers onto the momentary button wires. You’ll want longer wires than what I have here (I had to add extensions because I cut them too short).

Then plug those button wires into the reset and power pins on the ZimaBlade (in the photo, they’re at the corner closest to the camera and to the right).

Step 7:
Tuck the wires into the front half of the enclosure, then snap that onto the back half.

Step 8:
You’re done! Just plug in the USB-C power and an Ethernet cable to your router, then move on to the next section to set up the system.

Software
Step 1:
Connect both drives via Y SATA cable.
Connect Ethernet cable to router.
Plug in USB-C power adapter.
Step 2:
Wait for boot, then in your browser go to the ZimaBlade’s IP or:
casaos.local(Zima software doesn’t work, can’t find device)
Create login credentials
Step 3:
Open terminal using default login: casaos (username) casaos (password)
Immediately change password:
sudo passwd casaosInstall Cockpit:
sudo apt install cockpitInstall Storage:
sudo apt install cockpit-storagedRestart system.
Step 4:
After system restarts, open browser and go to:
https://ip-address-of-machine:9090(the IP address should be that of the ZimaBlade)
Use your casaos login credentials (with the password created in the terminal in Step 3).
Go to the Storage tab.
At the top-right under Devices, click the button and select “Create RAID device”
Choose a name for the RAID storage (mine is “RedStore” for “Redundant Storage”)
Choose a RAID level. I used Raid 1 (mirror), which means one drive is an exact copy of the other. You lose half your storage, but get 1:1 redundancy. If one drive fails, all of your data is still on the other drive.
Keep the default 512 KiB Chunk size.
Select the drive(s)
Step 5:
Select the RAID device you just created and Create Partition Table.
Choose to overwrite existing data.
Use MBR partitioning for maximum capability.
Step 6:
Create partition.
Use the full storage amount.
Choose to overwrite existing data.
Choose EXT4 Type (unless you have a reason not to).
Pick a name.
Check “Mount now” and leave “Mount read only” and “Custom mount options” unchecked.
Choose a mount point. This will be the location where the drives show up in the files. It can’t be root (that’s used by the ZimaBlade onboard 32GB storage for the OS). I used “/red” and suggest doing something similar. Make sure it is unique and not an existing folder.
Step 7:
If you go back to casaos.local, you should be able to click on “Files” and navigate to the new location. However, CasaOS will not show your new RAID storage under “Storage” properly—you’ll just see the individual drives listed.
I couldn’t find a way around that, which is unfortunate. It would be nice to see the status. Instead, you’ll have to go back to Cockpit to see information on your drive (like storage free space).
But the RAID storage is still there and usable. In CasaOS Files, you can upload files and folders to the RAID storage directory (i.e. “/red”) without any issues.
But for automatic files syncing for redundant storage, we’ll go a little further.
Step 8:
In CasaOS, go to the App Store and install Syncthing.
Then open Syncthing. It will ask you to set credentials for the GUI, so go ahead and do that. You’ll get a unique “Device Identification” number and a unique (longer) ID code for registering with other devices.
Copy the shorter Device Identification number, then go back to Cockpit.
Under Accounts, Create new account using the Device Identification number for the Full name and User name. Set a password. Then click on the account and check the Roles box for Container administrator.
This gives Syncthing permission to access the RAID storage—I think. The roles here are a little confusing, but mine didn’t work until I followed those steps.
Step 9:
Install Syncthing on your desktop PC. I used the SyncTrayzor utility client for Windows, from the Syncthing website.
When you open SyncTrayzor, you’ll get an interface similar to the one in CasaOS.
Once again, setup your credentials.
Now you need to add a Remote Device, which is the ZimaBlade’s Syncthing client. To add it, you’ll need the longer ID code. It may also show up automatically, since you’re on the same network. Give it a name. Once added, go the ZimaBlade Syncthing client and you should have a notification to add your desktop PC. Give it a name, too.
Step 10:
Now the desktop PC and ZimaBlade are linked, you just have to choose what to share/sync. I, for example, chose to sync my entire Documents folder. So anything I save there will be backup up to the redundant storage of the NAS.
In SyncTrayzor, click “Add Folder”.
Choose a folder label (i.e. “Docs”)
Keep the default Folder ID
In folder path, enter the path to the folder you want to sync (i.e. “C:\Users\[you]\Documents”)
On the Sharing tab, select the ZimaBlade device you registered.
Click Save.
On the ZimaBlade Syncthing client, you should get a notification that your desktop PC wants to share files. Accept that and the Add folder window will pop up.
This is where the synced files will go, so it should be a folder within your RAID Storage directory. Choose a name, keep the default Folder ID, and enter the path to the folder you want to use within your RAID storage.
You may also want to enable versioning on this side, which will keep backups of old deleted files and changes to files.
Click Save.
Syncthing and SyncTrayzor should handle everything else. They’ll copy everything in the folder to your RAID Storage over the network. If you keep SyncTrayzor running in the background on your desktop PC, it will automatically copy over any new files or file changes.
Step 11:
You may also want additional redundant storage for other things, aside from the synced backup you already created.
To do this, go to CasaOS files and find your RAID storage and create a new folder (i.e. “NAS Storage”).
Then click the folder options and choose Share.
CasaOS will make that folder available on the network, then give you a link to it. Copy that link.
Open Windows Explorer on your desktop PC and enter that link. When prompted, enter your CasaOS credentials.
If you can access the folder, you’re good to proceed.
In Windows Explore, right-click on Network and select Map Network Drive.
Choose an unused Drive letter and copy the link into Folder. Check Reconnect at sign-in. Then Finish.
The folder in your RAID storage will now show up as a network drive alongside your hard drives, so you can easily access it at any time.
Step 12:
Do other things! The ZimaBlade has quite a bit of power and can do a lot more than just act as a NAS. You can, for example, use it as a Minecraft server or a Home Assistant server, too.