Tag: how-to

  • ’80s Video Phone

    ’80s Video Phone

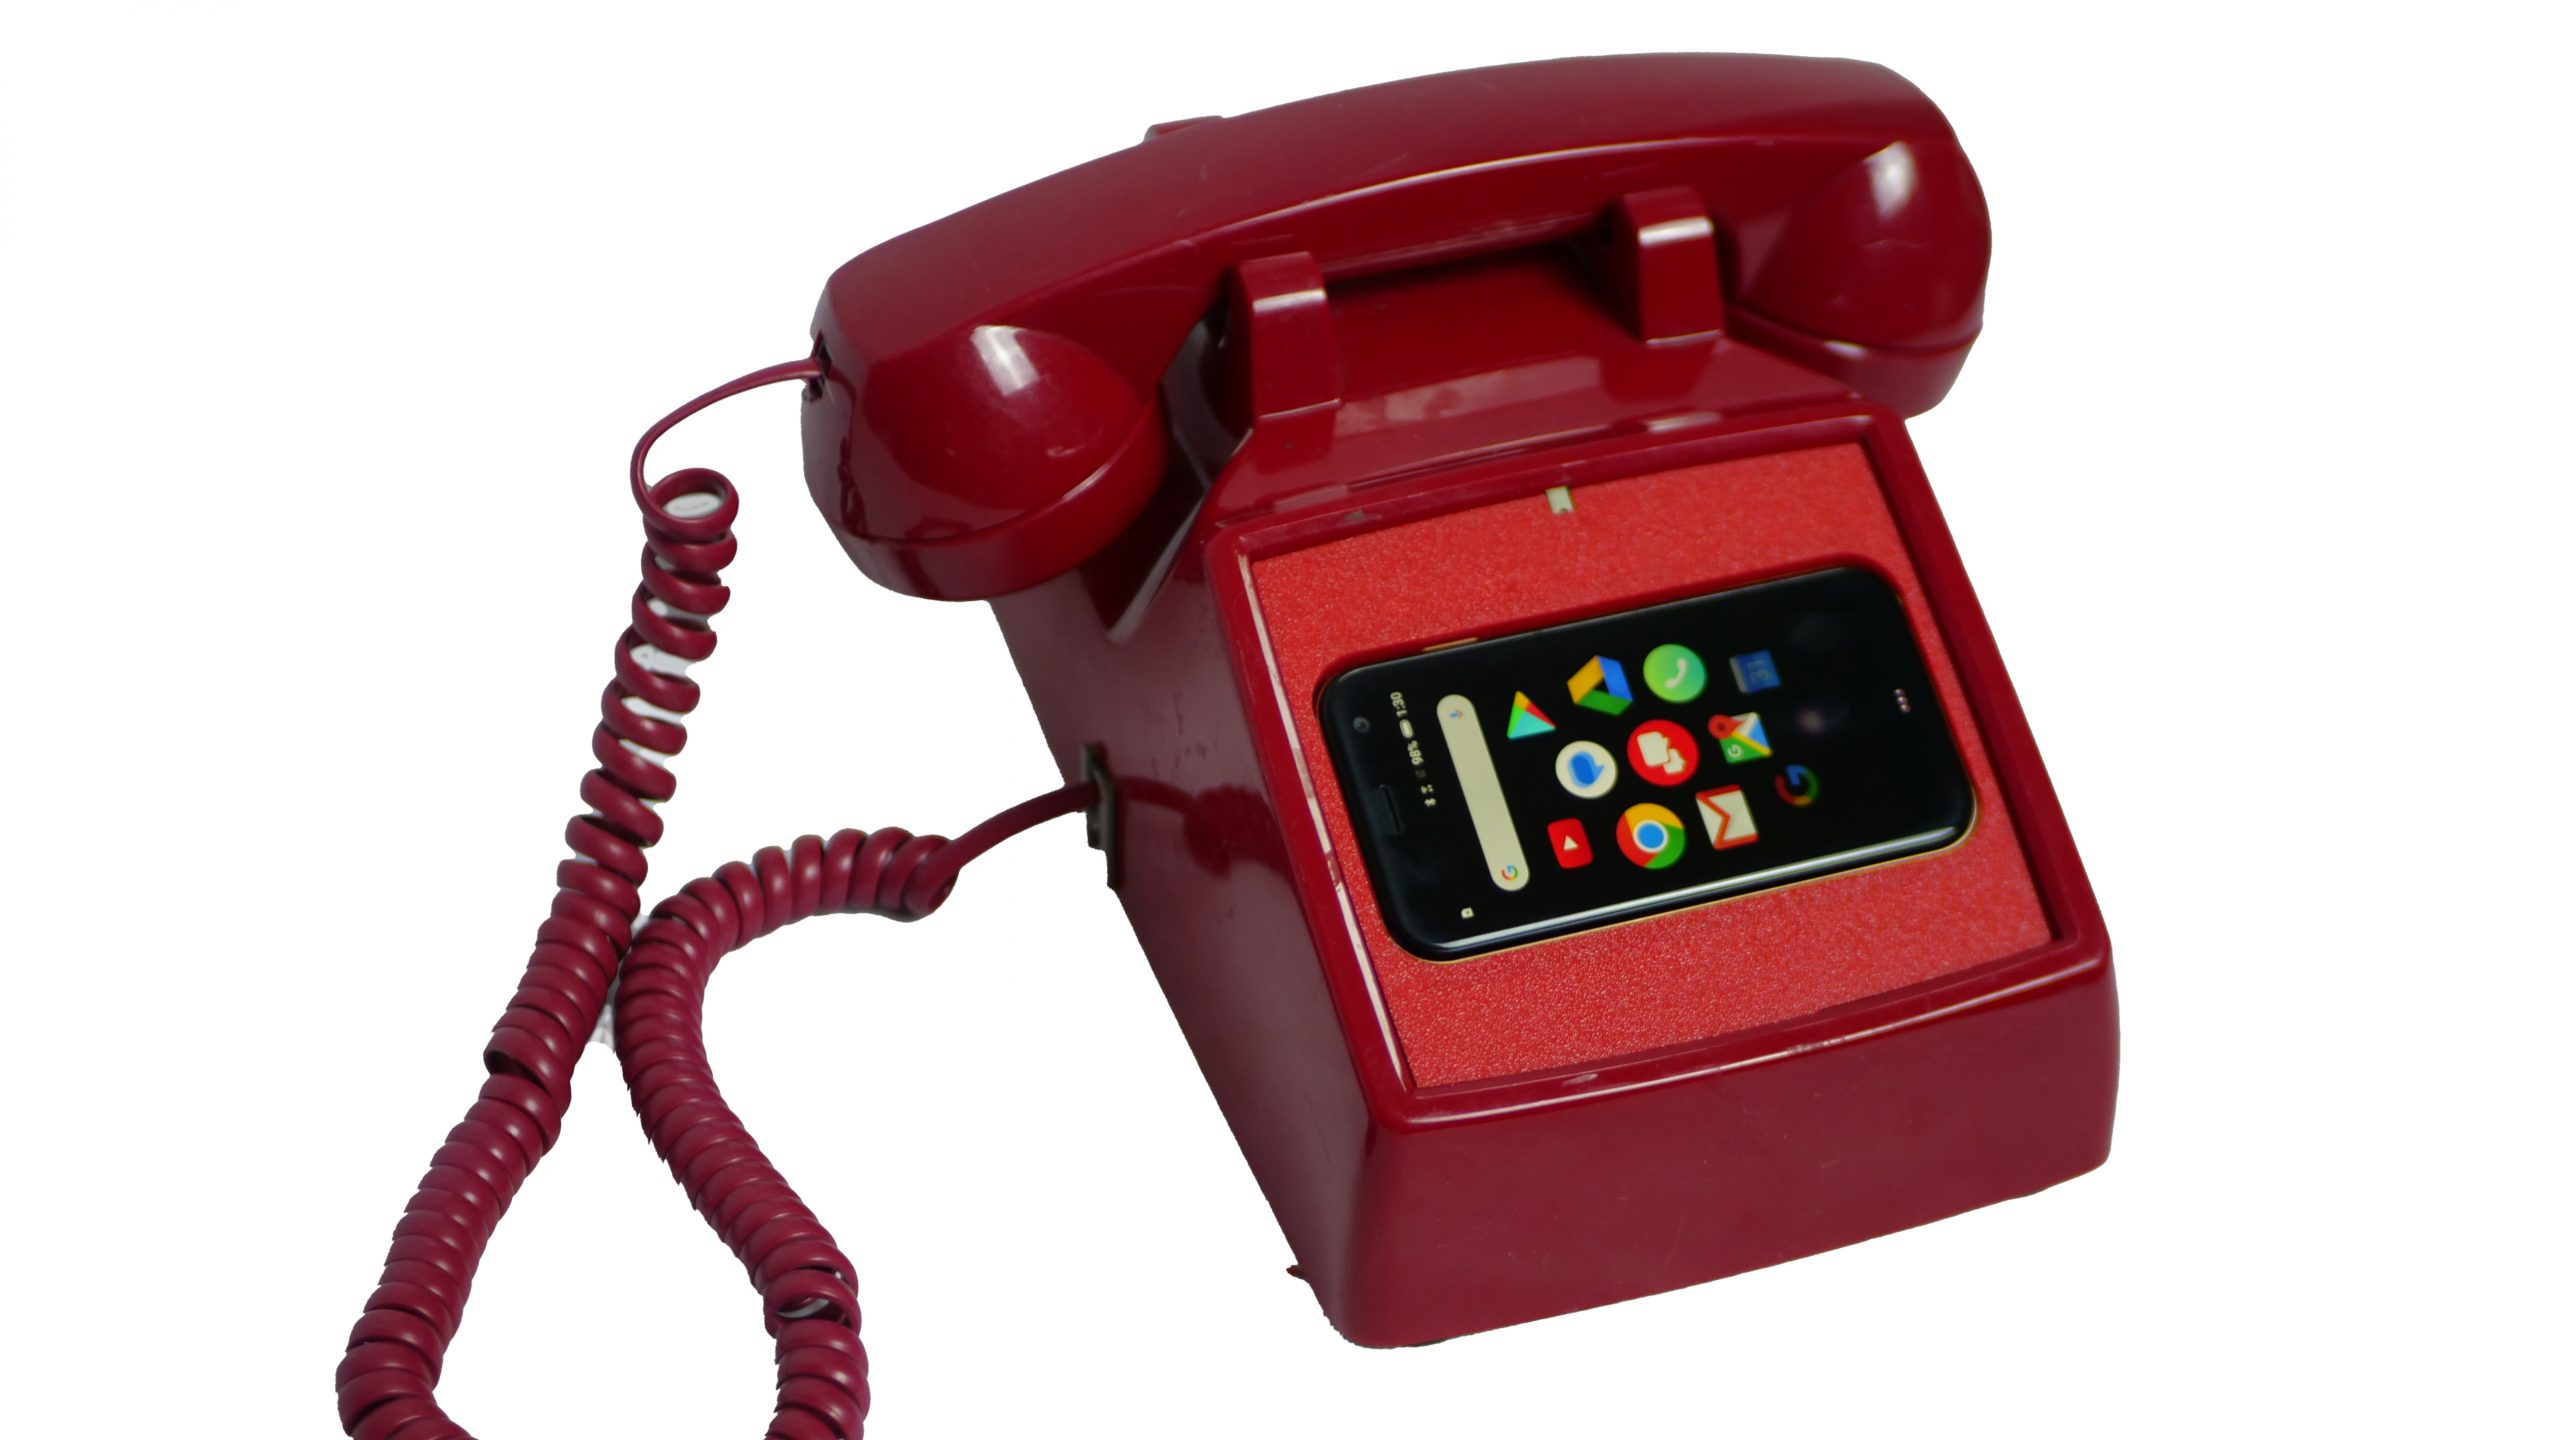
    I stumbled across concept art from the 1980s of a Videotex telephone concept and turned it into a real, functional retro-style video phone!

  • Compass Lock Escape Room Puzzle

    Compass Lock Escape Room Puzzle

    I think escape rooms are really neat, but my interest is more in the puzzle design than in solving existing puzzles. So I decided to build my own!

    This is a “lock” that players open by rotating the dial to different cardinal directions, following a sequence hidden in a clue.

    Full build instructions are here: https://www.hackster.io/cameroncoward/compass-lock-escape-room-puzzle-055aff

  • LuvNoots: Wall-Mounted ePaper SMS Display

    LuvNoots: Wall-Mounted ePaper SMS Display

    Do you want a way to leave messages for your loved ones, but you’re actively boycotting 3M and can’t use Post-it Notes?

    Then this is the solution for you!

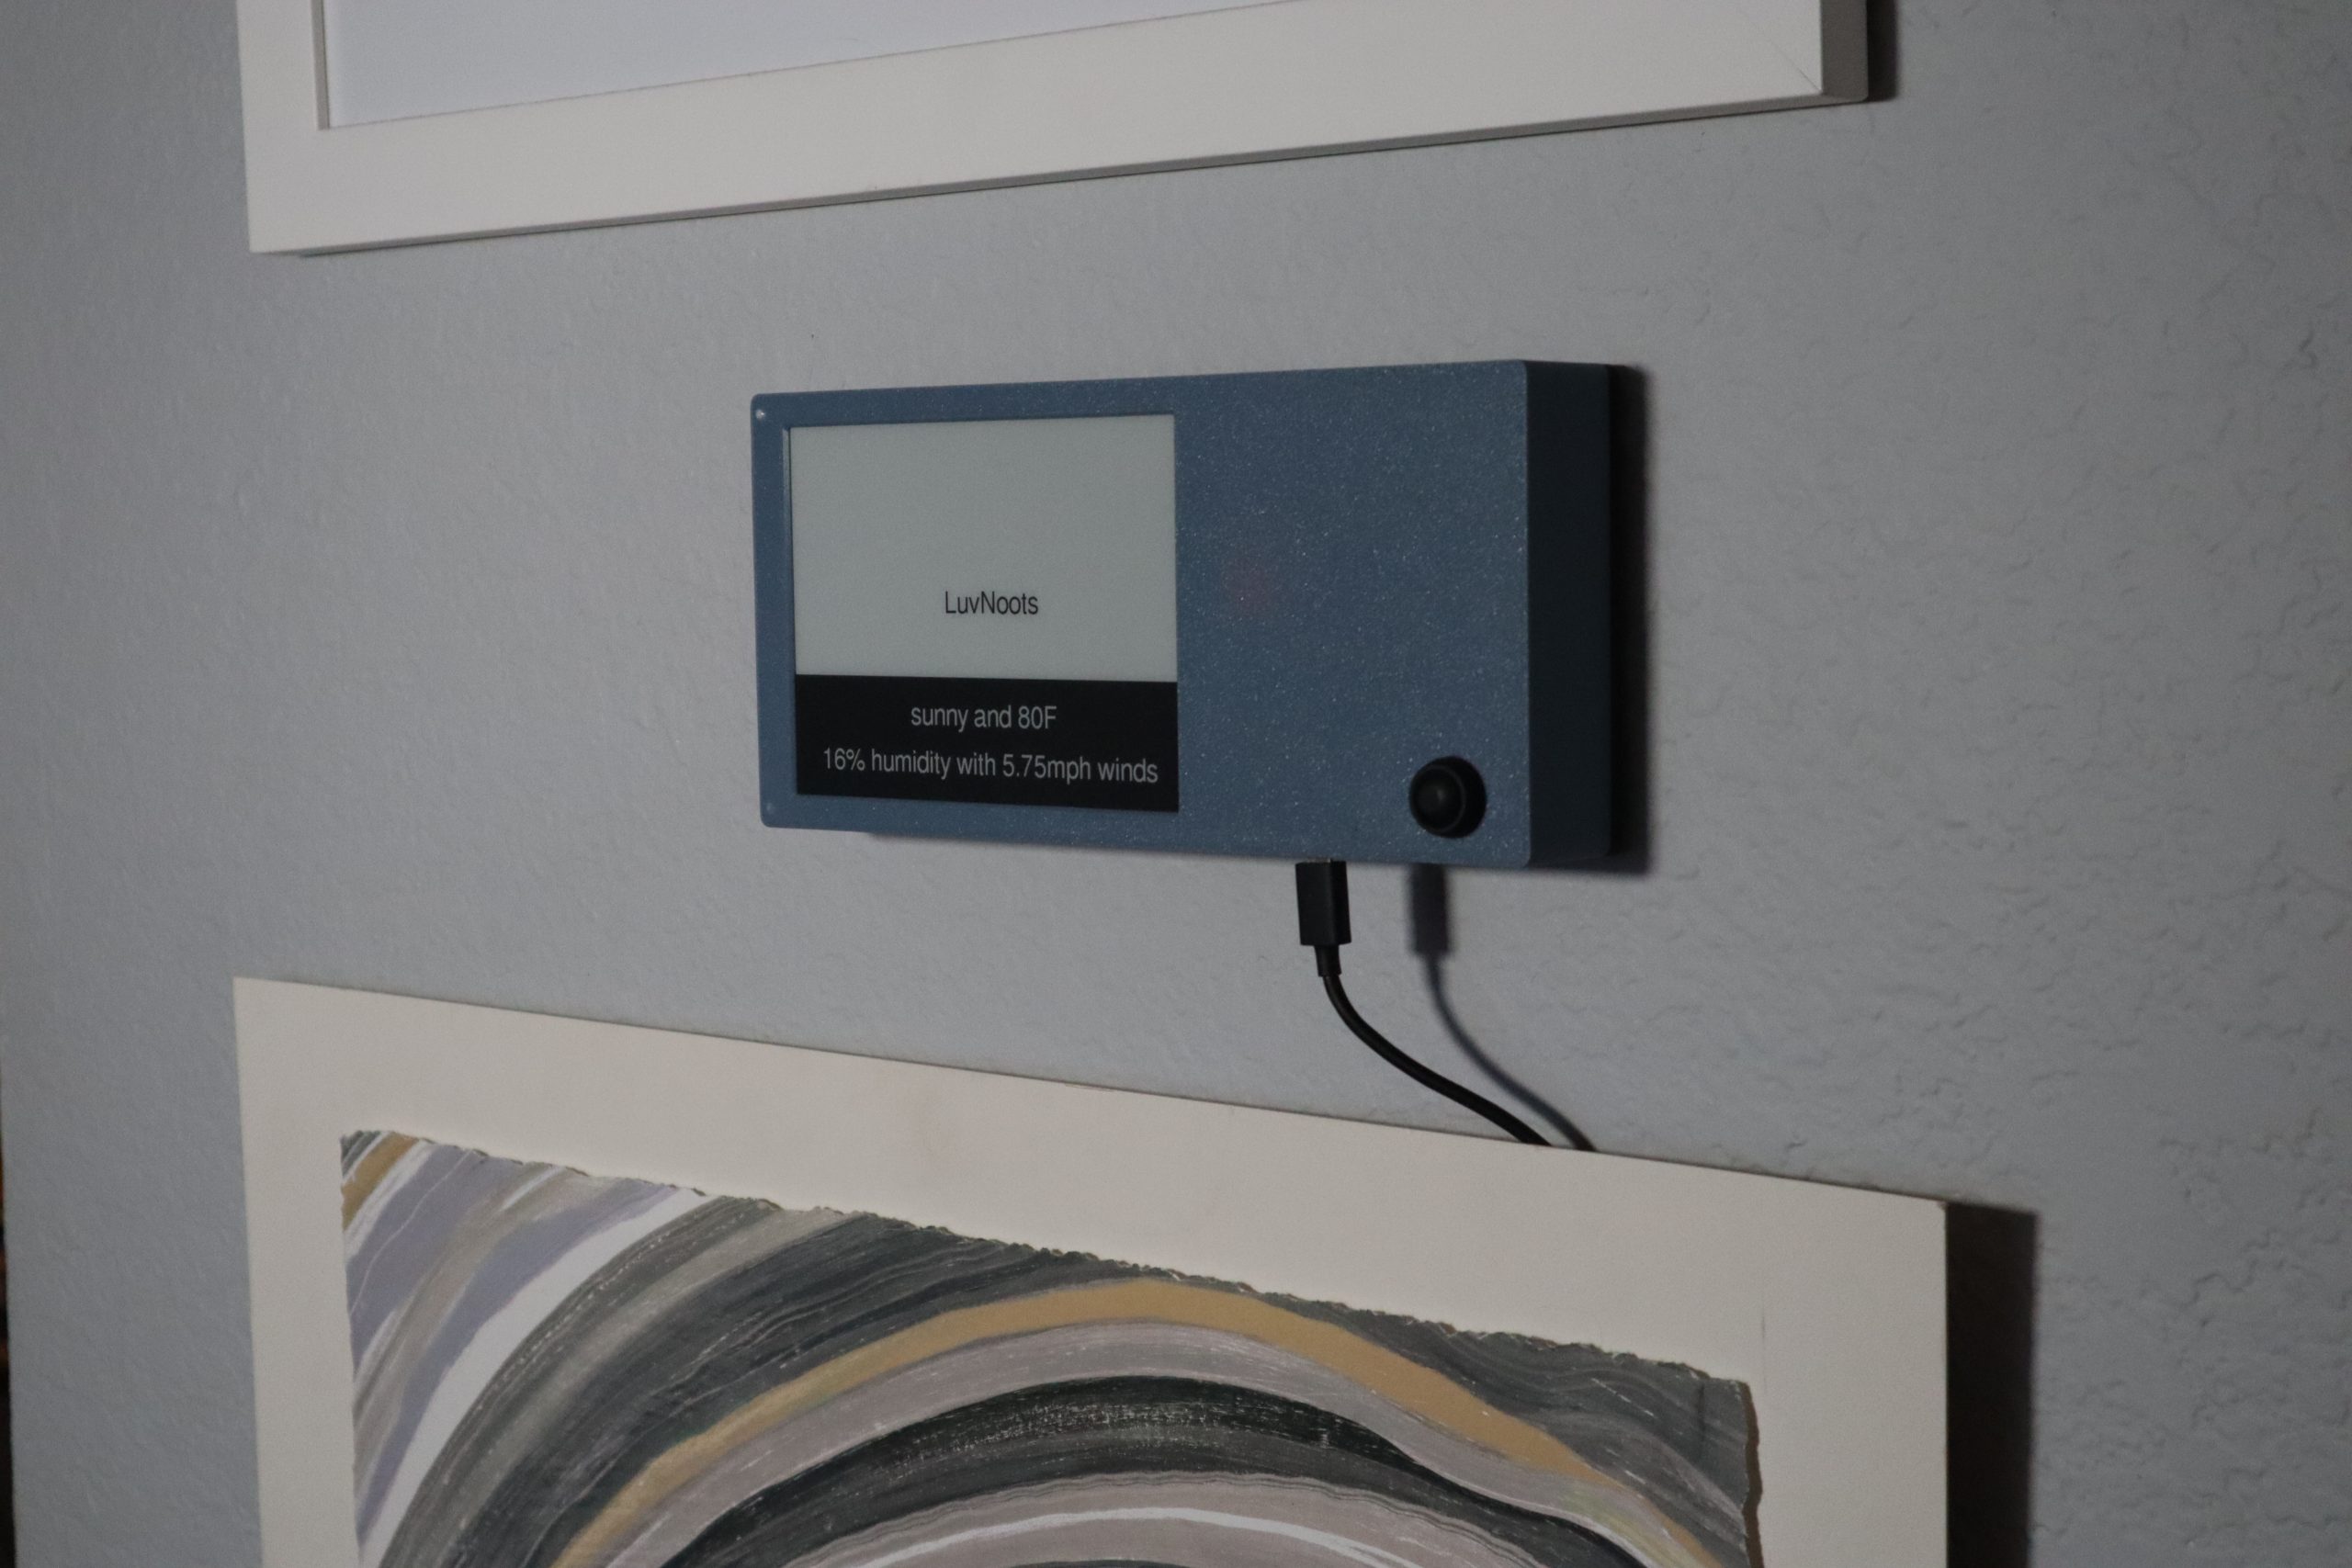
    LuvNoots is a wall-mounted display that shows text messages on a large ePaper screen. It also shows the weather, because IoT.

    Any plain SMS text message sent to the device’s phone number will show up, so you can give that number to a spouse, family member, or friends and they’ll be able to leave messages.

    Build instructions are available here:

    https://www.hackster.io/cameroncoward/luvnoots-f5b157

  • Dead E. Ruxpin: cassette-tape controlled animatronic

    Dead E. Ruxpin: cassette-tape controlled animatronic

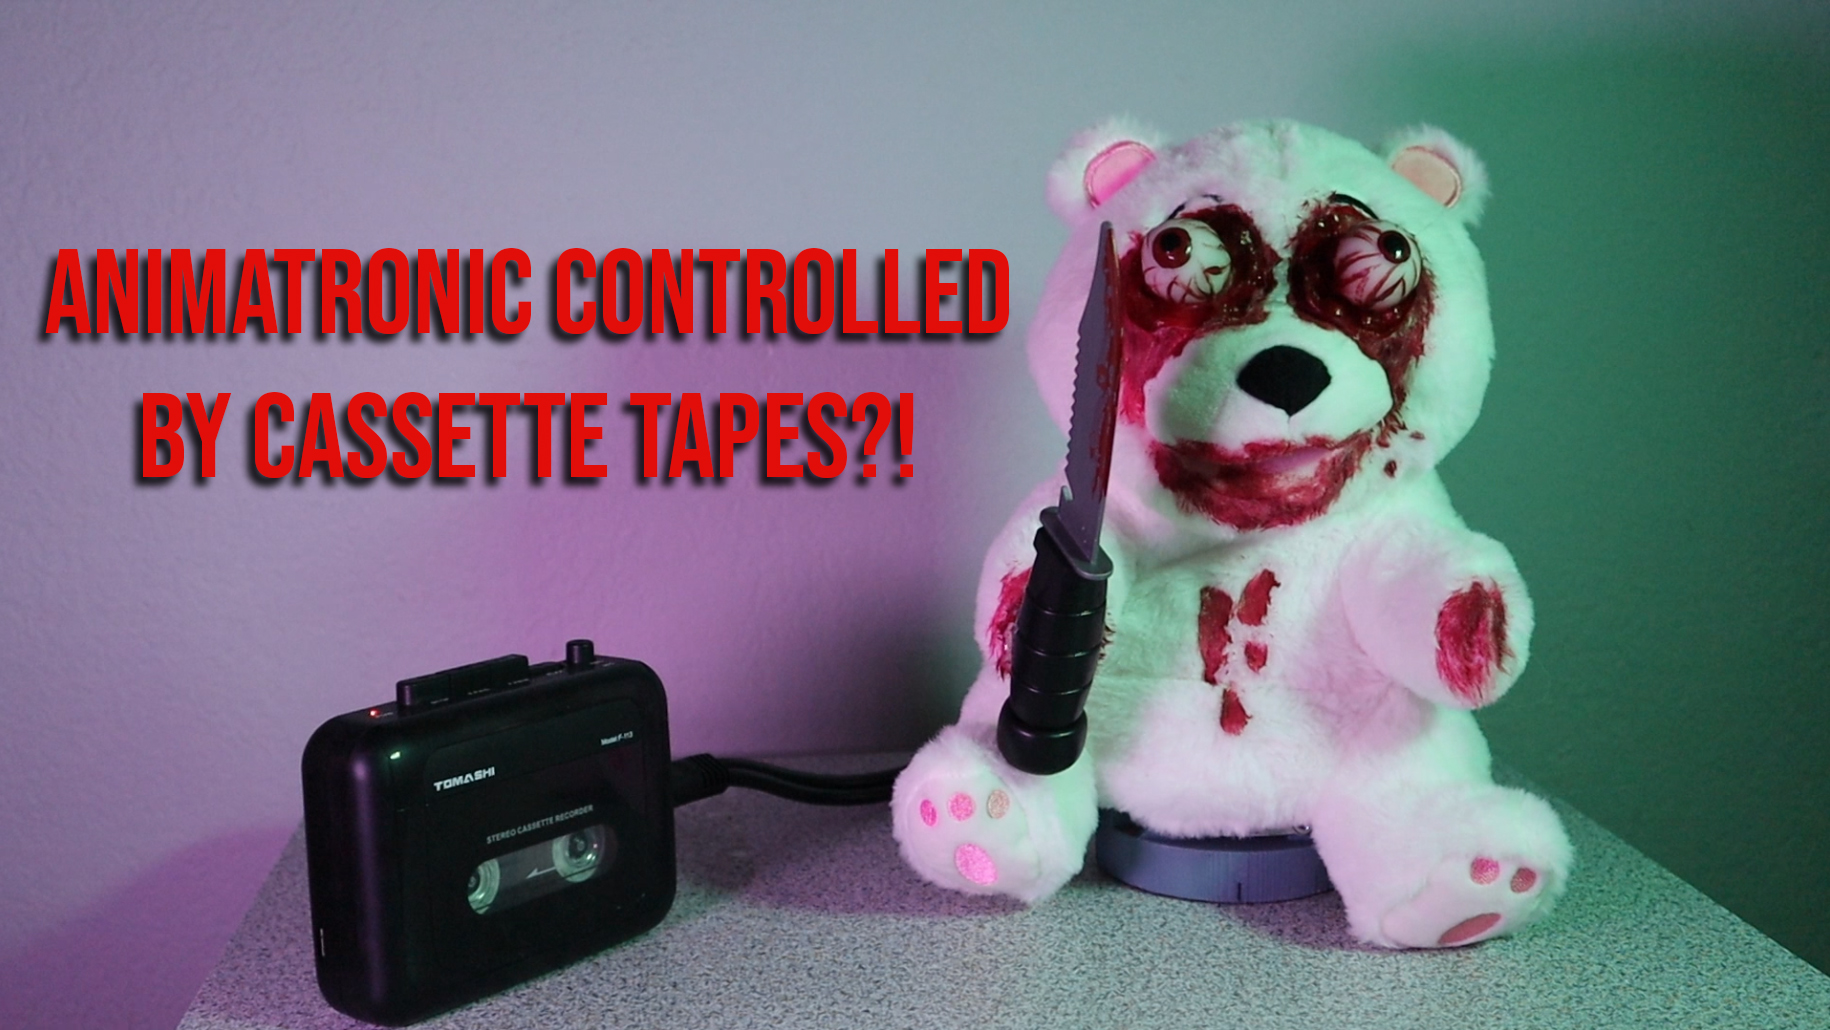
    This is a really fun project that I just finished in time for Halloween! It is an animatronic bear inspired by Teddy Ruxpin and it is completely controlled by cassette tapes. It has three servo motors that operate independently, all according to commands on one stereo channel of the tape while the other channel plays the audio!

    Full build instructions are available on Instructables here.

  • NASTIER: ZimaBlade Redundant Micro NAS

    NASTIER: ZimaBlade Redundant Micro NAS

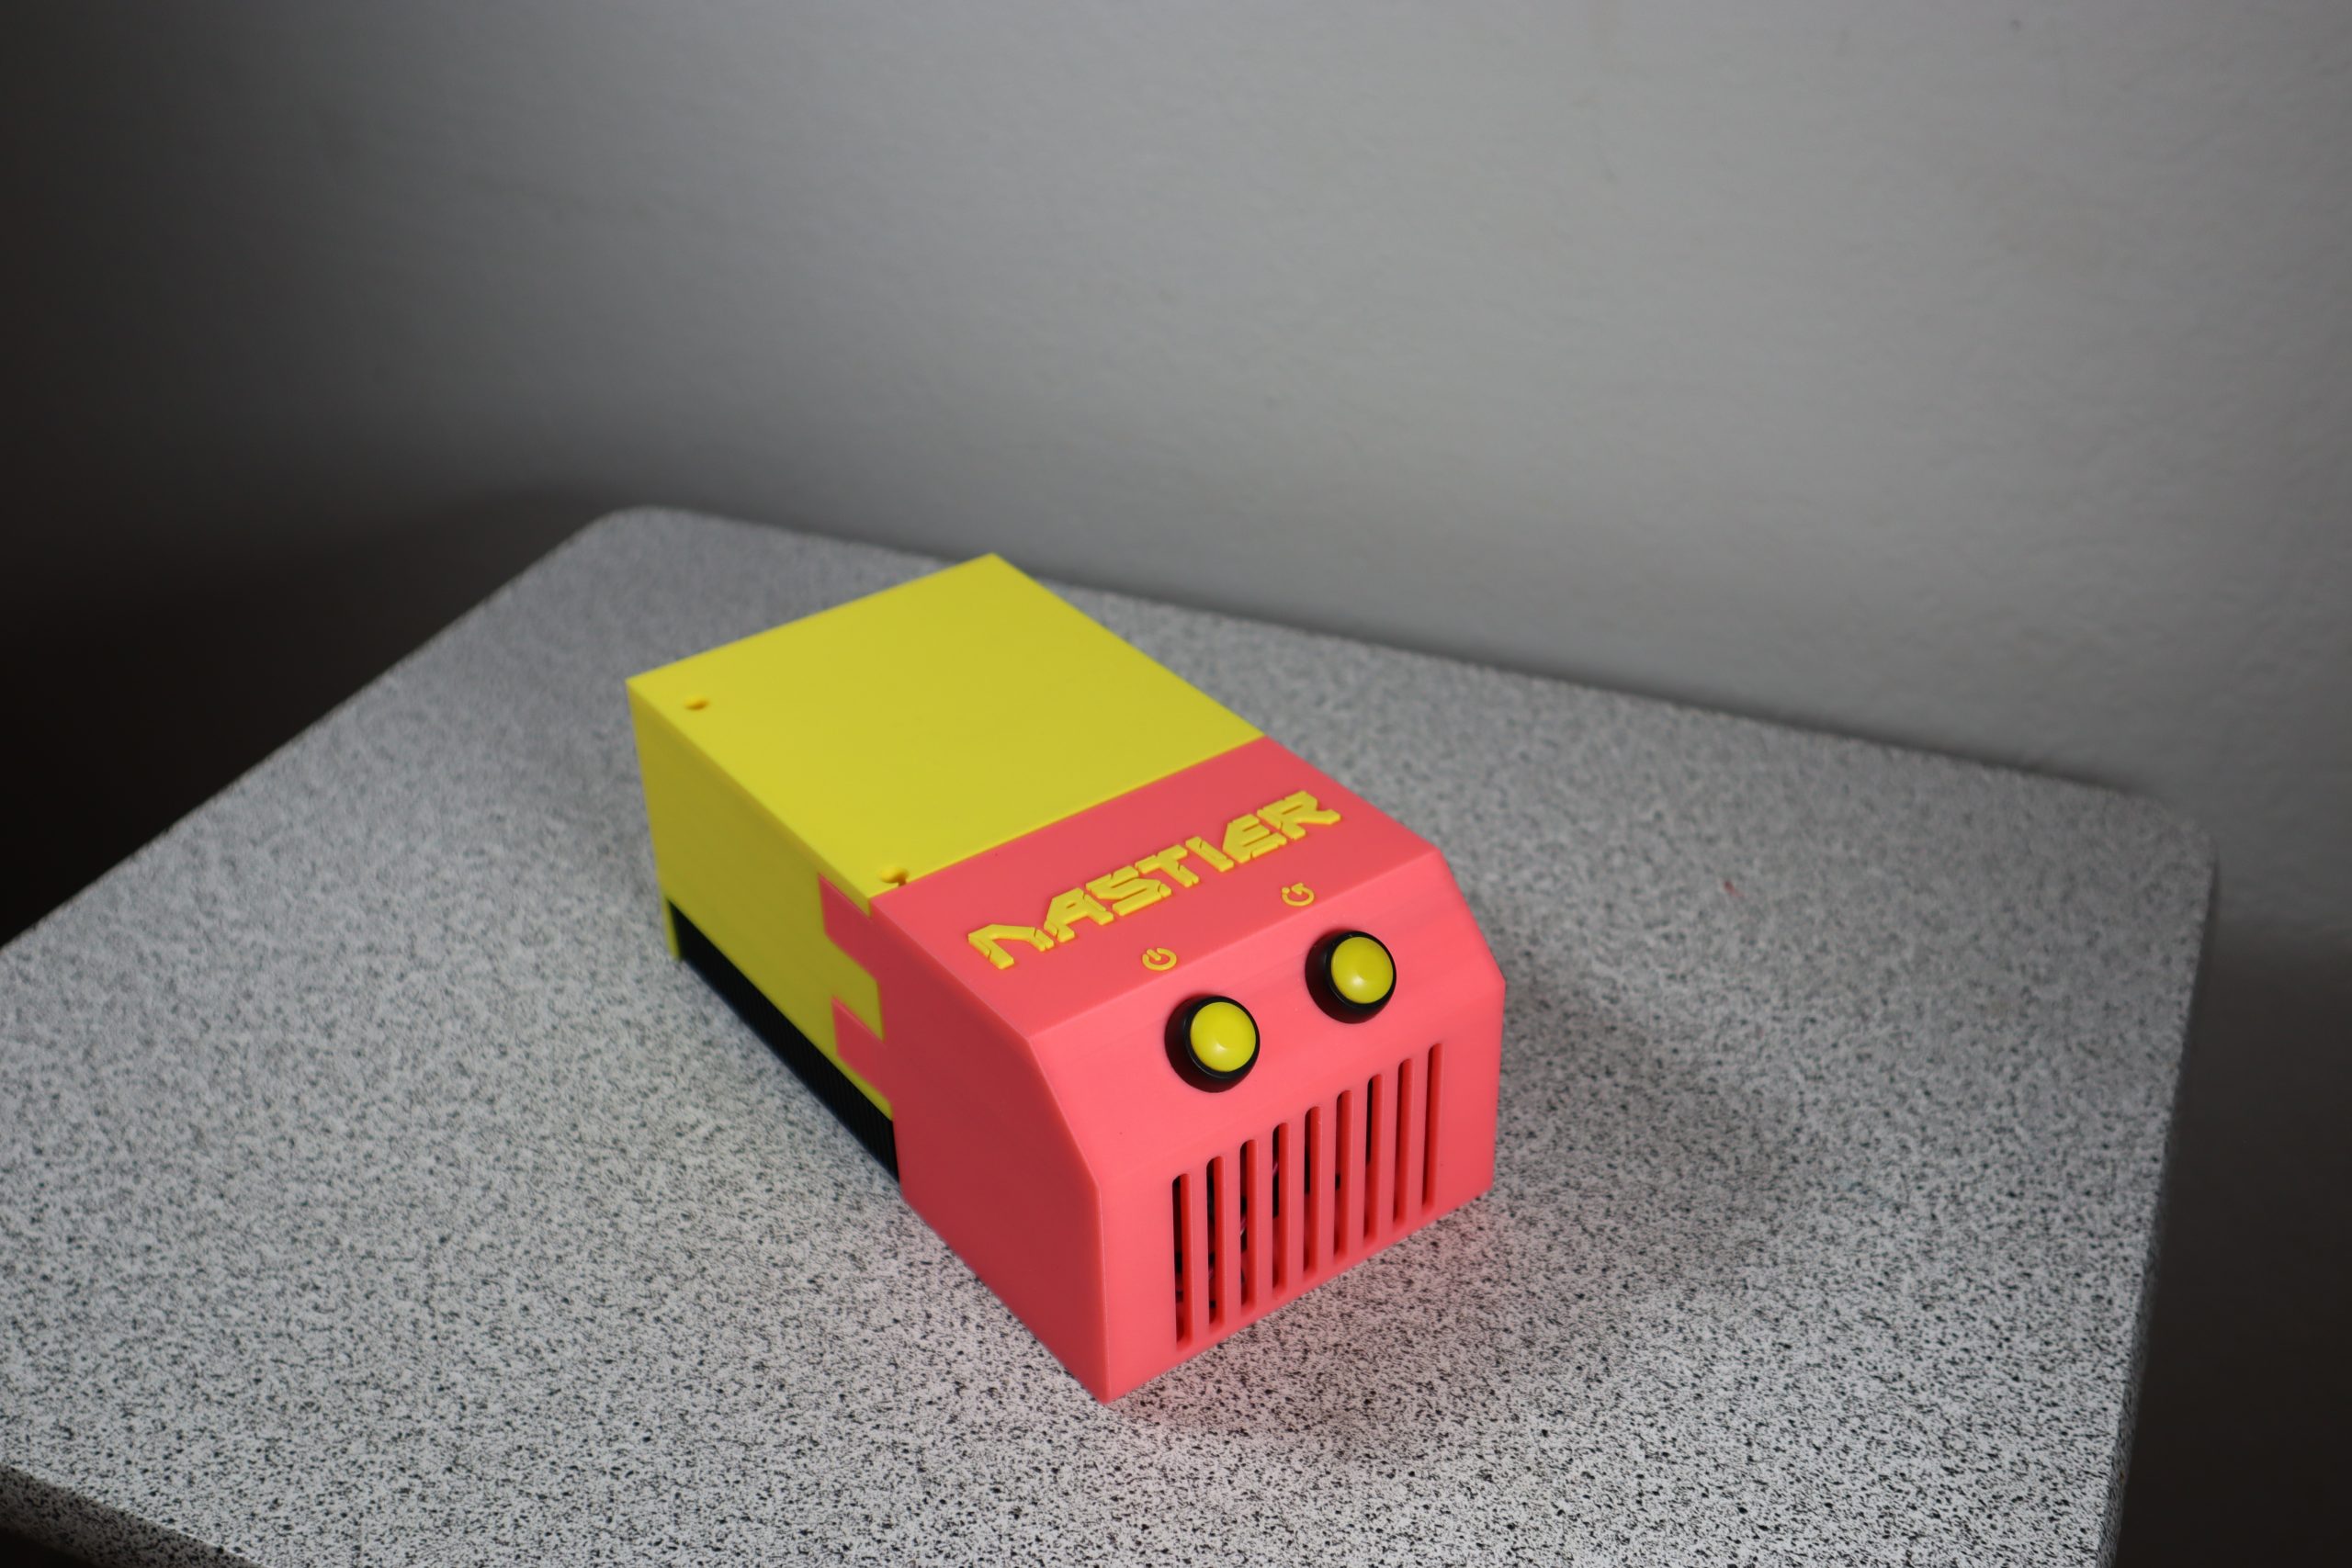
    NASTIER (Network-Attached Storage; Tiny; Inexpensive; Easy; Redundant)

    A ZimaBlade-based micro NAS with redundant Raid 1 storage and full server capabilities.

    Parts:

    Overview

    The folks at ZimaBoard sent me their new ZimaBlade “single-board server” to review for Hackster.io and I needed a project to test it out. NASTIER is the result!

    This is a compact, self-contained NAS (Network-Attached Storage) device with Raid 1 redundant SSD storage. It contains two 1TB SSD drives, which means NASTIER provides 1TB of space (since the drives are mirrored). That’s plenty of storage and the redundant backup gives peace of mind.

    You can also use NASTIER (and the ZimaBlade in general) for a lot more than just storage. It is a complete server with fairly decent processing power, so the sky is the limit.

    I’ll start by showing you how to assembled NASTIER, then I’ll walk you through setting it up for redundant storage (complete with automatic syncing).

    Assembly

    Before following these steps, you’ll want to 3D-print the two halves of the enclosure. Files are available on Instructables here.

    Step 1:

    Start by disassembling the case the ZimaBlade comes in. You do that by bending the sides (where the ports are) up and out.

    ZimaBlade disassembly

    Step 2:

    Remove the two screws holding the transparent cover in place.

    ZimaBlade diassembly

    Do not remove the other two screws that hold the board onto the metal base! That metal base is the heat sink and we’ll be keeping it attached.

    Step 4:

    Put the the board and heat sink into the back half of the enclosure. The ports should fit into their respective holes.

    NASTIER assembly

    Then use the two screws you removed earlier to attach the enclosure to the heat sink threads. The holes should be big enough for eyeglass-style screwdrivers.

    NASTIER assembly

    Step 5:

    Attach the two SSDs to the ZimaBlade using the Y cable provided.

    NASTIER assembly

    Then slide the drives into the slots.

    NASTIER assembly

    Step 6:

    Solder jumpers onto the momentary button wires. You’ll want longer wires than what I have here (I had to add extensions because I cut them too short).

    NASTIER assembly

    Then plug those button wires into the reset and power pins on the ZimaBlade (in the photo, they’re at the corner closest to the camera and to the right).

    NASTIER assembly

    Step 7:

    Tuck the wires into the front half of the enclosure, then snap that onto the back half.

    NASTIER assembly

    Step 8:

    You’re done! Just plug in the USB-C power and an Ethernet cable to your router, then move on to the next section to set up the system.

    NASTIER assembly

    Software

    Step 1:

    Connect both drives via Y SATA cable.

    Connect Ethernet cable to router.

    Plug in USB-C power adapter.

    Step 2:

    Wait for boot, then in your browser go to the ZimaBlade’s IP or:

    casaos.local

    (Zima software doesn’t work, can’t find device)

    Create login credentials

    Step 3:

    Open terminal using default login: casaos (username) casaos (password)

    Immediately change password:

    sudo passwd casaos

    Install Cockpit:

    sudo apt install cockpit

    Install Storage:

    sudo apt install cockpit-storaged

    Restart system.

    Step 4:

    After system restarts, open browser and go to:

    https://ip-address-of-machine:9090

    (the IP address should be that of the ZimaBlade)

    Use your casaos login credentials (with the password created in the terminal in Step 3).

    Go to the Storage tab.

    At the top-right under Devices, click the button and select “Create RAID device”

    Choose a name for the RAID storage (mine is “RedStore” for “Redundant Storage”)

    Choose a RAID level. I used Raid 1 (mirror), which means one drive is an exact copy of the other. You lose half your storage, but get 1:1 redundancy. If one drive fails, all of your data is still on the other drive.

    Keep the default 512 KiB Chunk size.

    Select the drive(s)

    Step 5:

    Select the RAID device you just created and Create Partition Table.

    Choose to overwrite existing data.

    Use MBR partitioning for maximum capability.

    Step 6:

    Create partition.

    Use the full storage amount.

    Choose to overwrite existing data.

    Choose EXT4 Type (unless you have a reason not to).

    Pick a name.

    Check “Mount now” and leave “Mount read only” and “Custom mount options” unchecked.

    Choose a mount point. This will be the location where the drives show up in the files. It can’t be root (that’s used by the ZimaBlade onboard 32GB storage for the OS). I used “/red” and suggest doing something similar. Make sure it is unique and not an existing folder.

    Step 7:

    If you go back to casaos.local, you should be able to click on “Files” and navigate to the new location. However, CasaOS will not show your new RAID storage under “Storage” properly—you’ll just see the individual drives listed.

    I couldn’t find a way around that, which is unfortunate. It would be nice to see the status. Instead, you’ll have to go back to Cockpit to see information on your drive (like storage free space).

    But the RAID storage is still there and usable. In CasaOS Files, you can upload files and folders to the RAID storage directory (i.e. “/red”) without any issues.

    But for automatic files syncing for redundant storage, we’ll go a little further.

    Step 8:

    In CasaOS, go to the App Store and install Syncthing.

    Then open Syncthing. It will ask you to set credentials for the GUI, so go ahead and do that. You’ll get a unique “Device Identification” number and a unique (longer) ID code for registering with other devices.

    Copy the shorter Device Identification number, then go back to Cockpit.

    Under Accounts, Create new account using the Device Identification number for the Full name and User name. Set a password. Then click on the account and check the Roles box for Container administrator.

    This gives Syncthing permission to access the RAID storage—I think. The roles here are a little confusing, but mine didn’t work until I followed those steps.

    Step 9:

    Install Syncthing on your desktop PC. I used the SyncTrayzor utility client for Windows, from the Syncthing website.

    When you open SyncTrayzor, you’ll get an interface similar to the one in CasaOS.

    Once again, setup your credentials.

    Now you need to add a Remote Device, which is the ZimaBlade’s Syncthing client. To add it, you’ll need the longer ID code. It may also show up automatically, since you’re on the same network. Give it a name. Once added, go the ZimaBlade Syncthing client and you should have a notification to add your desktop PC. Give it a name, too.

    Step 10:

    Now the desktop PC and ZimaBlade are linked, you just have to choose what to share/sync. I, for example, chose to sync my entire Documents folder. So anything I save there will be backup up to the redundant storage of the NAS.

    In SyncTrayzor, click “Add Folder”.

    Choose a folder label (i.e. “Docs”)

    Keep the default Folder ID

    In folder path, enter the path to the folder you want to sync (i.e. “C:\Users\[you]\Documents”)

    On the Sharing tab, select the ZimaBlade device you registered.

    Click Save.

    On the ZimaBlade Syncthing client, you should get a notification that your desktop PC wants to share files. Accept that and the Add folder window will pop up.

    This is where the synced files will go, so it should be a folder within your RAID Storage directory. Choose a name, keep the default Folder ID, and enter the path to the folder you want to use within your RAID storage.

    You may also want to enable versioning on this side, which will keep backups of old deleted files and changes to files.

    Click Save.

    Syncthing and SyncTrayzor should handle everything else. They’ll copy everything in the folder to your RAID Storage over the network. If you keep SyncTrayzor running in the background on your desktop PC, it will automatically copy over any new files or file changes.

    Step 11:

    You may also want additional redundant storage for other things, aside from the synced backup you already created.

    To do this, go to CasaOS files and find your RAID storage and create a new folder (i.e. “NAS Storage”).

    Then click the folder options and choose Share.

    CasaOS will make that folder available on the network, then give you a link to it. Copy that link.

    Open Windows Explorer on your desktop PC and enter that link. When prompted, enter your CasaOS credentials.

    If you can access the folder, you’re good to proceed.

    In Windows Explore, right-click on Network and select Map Network Drive.

    Choose an unused Drive letter and copy the link into Folder. Check Reconnect at sign-in. Then Finish.

    The folder in your RAID storage will now show up as a network drive alongside your hard drives, so you can easily access it at any time.

    Step 12:

    Do other things! The ZimaBlade has quite a bit of power and can do a lot more than just act as a NAS. You can, for example, use it as a Minecraft server or a Home Assistant server, too.
  • Comparatron – DIY Digital Optical Comparator

    Comparatron – DIY Digital Optical Comparator

    Comparatron won the Grand Prize in the Instructables Reuse Challenge contest!

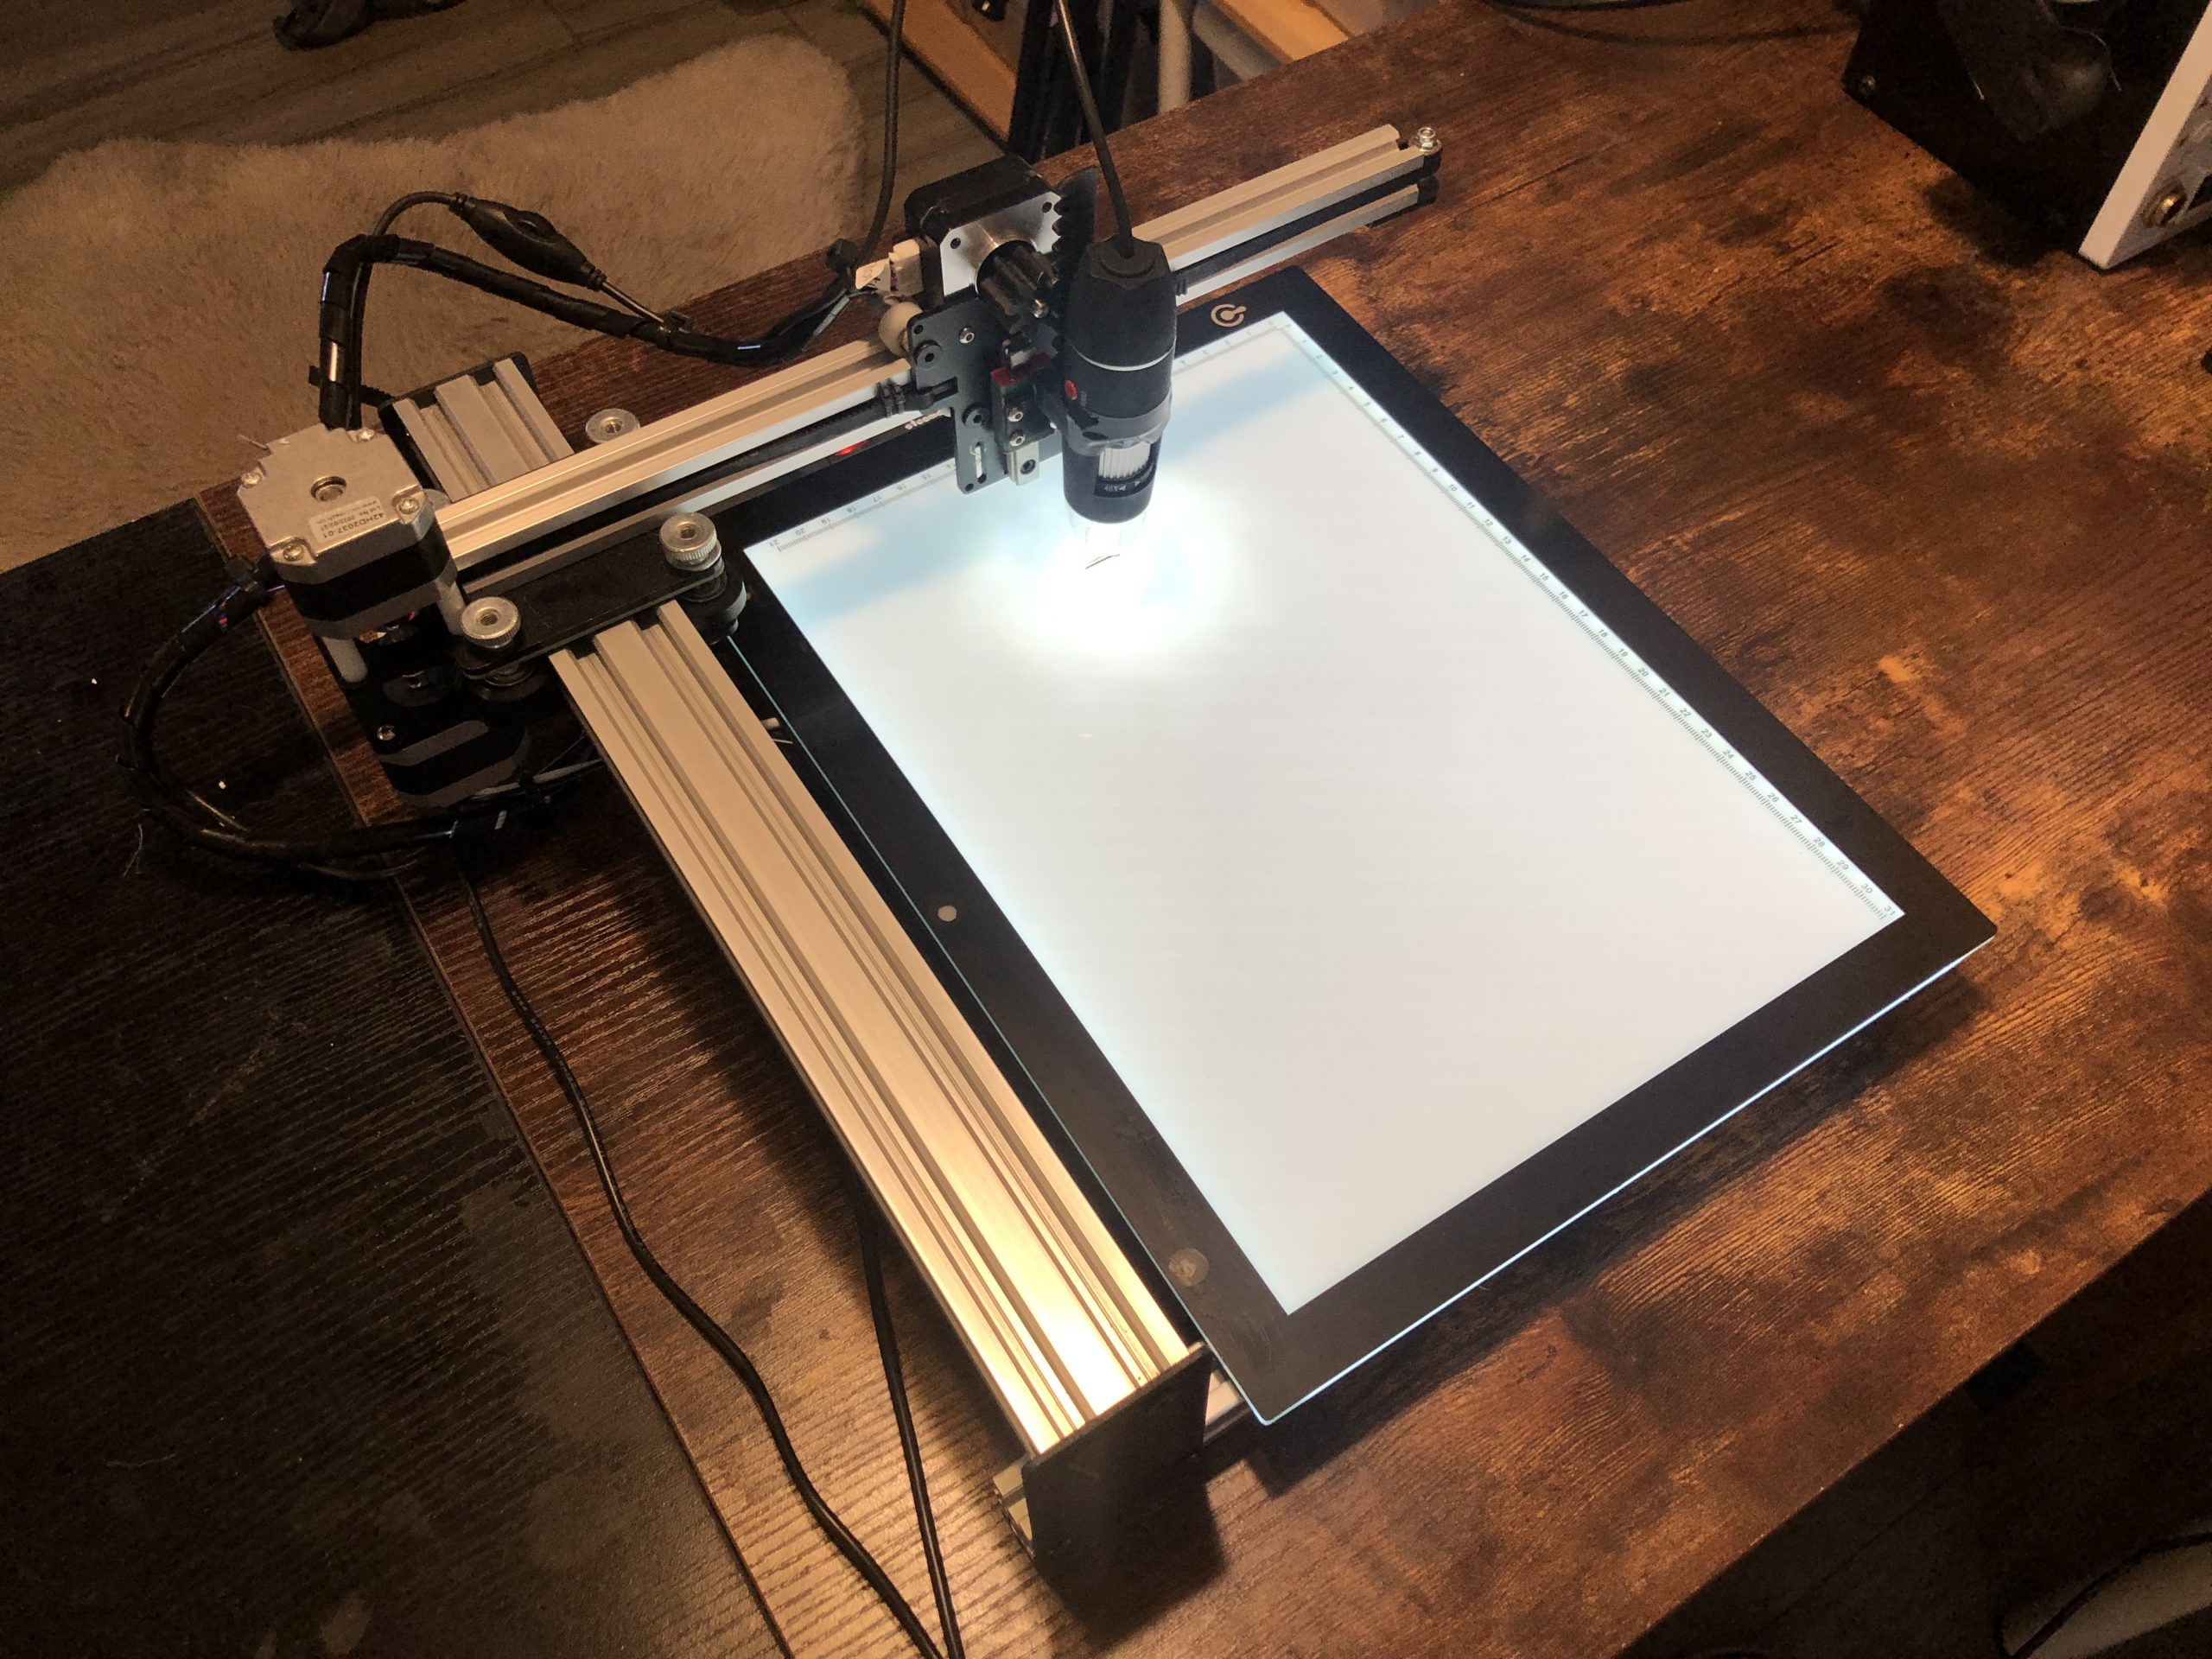
    Many of my projects interface with existing devices or items, which means that I have to obtain accurate dimensions of those objects to ensure a good fit. That’s easy to do with calipers if the object is simple, but it is very difficult when the object has a complex shape.

    Back when I was a mechanical designer, I worked for a medical company where my job involved reverse-engineering tiny medical devices (like bone screws). To get precise measurements, I used an instrument called an optical comparator that lets you measure distances and angles through a microscope.

    Optical comparators are very expensive instruments (easily tens of thousands of dollars), so I decided to build an affordable version that I’m calling Comparatron.

    Demonstrating Comparatron

    Building this requires the following parts:

    iDraw Pen Plotter 2.0

    USB Microscope

    Tracing light box

    USB Hub

    Good news! The folks at iDraw liked this project so much that they’re giving everyone 15% off their pen plotters. Just go to their store (https://idrawpenplotter.com/shop) and use the coupon code “CAMERON” to get the discount.

    Building and using

    Full build instructions, 3D-printable files, and software are available on Instructables here: https://www.instructables.com/Comparatron-an-Affordable-Digital-Optical-Comparat/

    Additional information and a standalone executable version of the Python software is available on GitHub here: https://github.com/theserialhobbyist/comparatron

    But here is a basic breakdown:

    Print the two parts on any 3D printer. Then remove the iDraw Pen Plotter’s pen lift mechanism and attach the microscope mount, and press-fit the spur gear to the motor shaft.

    Connect the USB cables to your computer (a USB hub makes things easier).

    Launch the software (either the Python script or the standalone executable) on a Windows PC, connect to the pen plotter, then move the microscope over your part and start marking points.

    When you’ve marked all of your points, export the DXF file. Then import that DXF file into the CAD/design software of your choice and use the points as references for your design.

    That’s it! I think this is a very useful tool and I’m quite proud of it. If you decide to build one, please let me know!

  • Jeep Grand Cherokee WK2 Double DIN Stereo Install Parts

    Jeep Grand Cherokee WK2 Double DIN Stereo Install Parts

    I recently bought a 2011 Jeep Grand Cherokee (WK2) Laredo 4×4 w/ 5.7L Hemi. It came with the UConnect stereo, which was nice. But it didn’t have navigation and I missed Carplay. I wanted to install an aftermarket stereo, but it turned out to be pretty difficult to figure out what parts are required.

    I successfully installed mine, so I thought I’d give you all a list of all of the parts you need so you can do the same. I’m not sure which other years this works for, so you’ll want to check on that. Importantly, these parts will let you use the steering wheel control buttons, the factory backup camera, and the factory amp/subwoofer (if you have them).

    The parts:

    Stereo: I used an ATOTO A6 PF, which I like a lot. You can use other models, but I would recommend finding one that is shallow. Some info I’ve found online suggests that you need to modify that sub-dash, but I didn’t have to do much for this stereo (more on that later).

    Wiring adapter: The main adapter you need is the PAC RP4-CH11, which has a special adapter for your steering wheel controls.

    Retention harness: The AXXESS Chrysler RSE Retention Harness provides the connection for the backup camera. I believe if you have rear seat entertainment screens, it might also let you connect those to your new stereo but I don’t have those and can’t confirm.

    Antenna adapter: This Metra 40-EU10 adapter lets you connect the factory antenna cable to conventional coax antenna ports most aftermarket stereos.

    Dash install kit: I used the Metra 95-6513B, but it didn’t fit my stereo quite right and I had to trim the plastic. Another option is the AI CDK652, but I can’t confirm if that works better or not.

    Trim removal tools: You’ll need basic tools (wrenches, screwdrivers, wire strippers, etc.) for the install, but on you thing you might not have is a set of trim removal tools. These will help a lot and keep you from damaging your dash.

    The install and modifications

    I’m not going to cover the full process here (there are videos on YouTube), but I do want to give you some tips:

    The PAC RP4-CH11 will come with two harnesses (with the gray plugs) and you only need to use one of them. If your Grand Cherokee has the subwoofer in the cargo area, then you’ll need the “B” unit. If it doesn’t, then you’ll need the “A” unit. The plugs aren’t compatible, so you shouldn’t be able to accidentally plug in the wrong one.

    The PAC RP4-CH11 control unit (the blue box) has a dial to select your radio brand. This is to set the steering wheel control (SWC) buttons to the right functions. For my ATOTO stereo, I used the “other” setting. But it probably doesn’t matter, since the stereo lets you configure each button’s function in software.

    There are two cables that the antenna adapter will fit in. You want the white plug, because the yellow plug is for the satellite radio antenna.

    There is a cable with a small gray square plug that you disconnect from your stock stereo. You won’t connect that to anything on your new stereo. I believe it does something for the Uconnect. I mention this because I was confused about if it was supposed to go somewhere.

    You’ll need to remove the metal frame inside the dash. There are three bolts that hold it in place. You can get it out by twisting it around. Replace one of the bolts for your chassis ground wires.

    Some sub dash modification may be required. Online info suggests that some double-DIN stereos require substantial modification of the sub dash. But all I had to do was file down some of the plastic at the corners of the outer frame so that I could slide the new stereo.

    You may need to modify the dash install kit plastic parts. My Metra kit didn’t fit the ATOTO stereo properly and I had to trim down the side with a Dremel to get it to fit.

  • How to Modify a Curt Trailer Hitch for 3rd Gen Monteros

    How to Modify a Curt Trailer Hitch for 3rd Gen Monteros

    All of the trailer hitch options currently available for third generation Mitsubishi Monteros/Pajeros reduce ground clearance below the bumper by quite a lot. The Montero’s departure angle is already less than ideal, so making it worse with a trailer hitch is unacceptable. Still, some of us need to tow.

    Montero Modified Hitch
    Modified Curt trailer hitch for 3rd gen Monteros

    To help the situation, I modified a new Curt trailer hitch for my 3rd gen Montero. This gained me about 2.5 inches of ground clearance below the receiver tube, with the tube tucked up just below the bumper. In this guide, I’ll explain how you can perform a similar modification.

    Disclaimer: I am not responsible if you hurt yourself performing this modification, if you waste your money ruining the hitch, or if it falls apart and causes your trailer to come off and kill a family in a minivan behind you on the highway. This requires proper welding and you shouldn’t attempt it if you don’t have a lot of welding experience.

    Other people have done similar modifications, but some go about it in different ways. I chose to do what I felt was the simplest method: cutting the crossbar off of the upright mounts, then rewelding it 2.5″ higher up. This illustrates the basic idea:

    Montero trailer hitch modification

    The idea is straightforward. If you’re an experienced fabricator, you can probably figure out how to do it properly just by looking at that illustration. But I’ll go ahead and explain the whole process for people who want the full story and who want to avoid mistakes.

    Supplies

    Everything linked to above (aside from the hitch itself) is just a suggestion. If you prefer other brands, go ahead and use them.

    I won’t get into the specifics of the welding here, because I can’t teach anyone how to weld properly in a short article like this. But you should be prepared for MIG welding on mild steel. Obviously your hitch needs to handle pulling the weight of a trailer, so it needs strong welds. This is not the time to try your hand at welding for the first time! Hire a pro if you need to.

    Measurements

    Before even looking at your cut-off wheels, you need to take thorough measurements. Later, when you weld the hitch back together, you will need to reference these measurements in order to make sure the hitch will actually bolt onto your truck. If you’re off by even 1/8″ in some places, it may not fit anymore.

    A few things to note that should help:

    • The two upright supports are parallel to each other, and perpendicular to the cross bar.
    • The distance between the top of the upright supports (where the bolt holes are) to the top of the cross bar is equal on both sides.
    • The cross bar does not need to move forward or backward at all, nor does it need to tilt. It just needs to move straight up by 2.5″.

    I recommend that you take the following measurements, at bare minimum:

    • Distance between upright supports (most important)
    • Distance from top of upright supports to top of cross bar
    • Forward/backward position of cross bar on the upright supports

    It is also very helpful to use your speed square and your marker to draw guidelines before you start cutting. Those lines will be very helpful when you do your welding. If nothing else, draw vertical lines from the cross bar up.

    Cut the original welds

    Put a cut-off wheel on your angle grinder, take a deep breath, and then start cutting.

    You want to cut through the welds on the four edges at each end of the cross bar (where the red lines are in the diagram above). Do your best not to cut into the upright supports at all, as that could weaken them. Just cut the welds and through the cross bar tube as close to the upright supports as you can get.

    If you have a good angle grinder, the entire cutting process should only take 5-10 minutes. This is thick metal, but cut-off wheels will chew through anything if the angle grinder has enough power.

    After the upright supports are off, switch to flap discs and sand down the welds on the upright supports until they are nice and smooth. Also remove the paint where you will be welding.

    Smooth down the cross bar ends, as well. Try to keep the edges even, so the cross bar will be easier to weld perpendicular to the upright supports. Again, remove the paint where you will be welding.

    If you want, you can use your cut-off wheels to trim off the bottom ends of the upright supports. I didn’t do so, as they are at the outsides by the tires and don’t hang any lower than the receiver tube. But if the excess length bothers you, you can trim it off.

    Spacers

    While cutting through the welds, you will have inevitably removed some material from the cross bar, which shortened it. If you don’t compensate for that, the overall width will be too short and your bolt holes won’t line up.

    You can compensate for the shortened cross bar in one of two ways: leave a small gap when welding, or add more material.

    This is where your measurements come in. If the length of your cross bar is now more than 1/8″ shorter than the original distance measurement between upright supports, then you will need to add material. If it isn’t, then you can get away with a small gap.

    In my case, my cross bar was about 0.35″ shorter than it needed to be. So I purchased two 3/16″ thick mild steel plates to act as spacers.

    I wouldn’t recommend plates any thinner than 1/8″, though. If need be, you can use a space on one side and not the other. This will mean that your receiver tube is very slightly off center, but that shouldn’t have a negative effect (as far as I know).

    Welding

    Other than ensuring that you are getting solid welds, the most important thing here is to ensure that the upright supports are perfectly perpendicular to the cross tube and that they are the proper distance apart.

    Triple check your measurements, use your marker for positioning lines, and make good use of your speed square.

    When you’re positive that everything is lined up properly, tack weld the upright supports to your cross tube. Then measure everything again. If it is still good, then finish up your welds. Follow standard techniques to avoid heat warping. If you’re using spacers, make sure they’re solidly welded to both your cross tube and your upright supports.

    Once everything is cool, check your measurements one more time.

    Cleaning up

    As with any other welding, you can use your flap discs to clean up your welds and any spatter, if you want to. Just don’t weaken your welds by grinding them down too much.

    Then use something like degreaser or plain isopropyl alcohol to wipe the whole hitch down clean.

    Finally, use your spray paint in a few thin coats to cover any bare metal. I found that a standard gloss black enamel from Ace Hardware matched pretty well, but use whatever you prefer. You won’t be able to see it, so this is mostly for rust protection.

    Install

    After the paint dries, you can follow the standard Curt installation instructions. Yes, the bolt behind the rear AC compressor sucks. No, there isn’t any real trick to it. Just be patient.

    With this modded hitch, you will either need to remove the plastic fascia under the bumper entirely or cut an opening in it for the receiver tube. I just removed it, since I can’t think of any reason to bother keeping it.

    That’s it! Now you can tow without hurting your departure angle much. The receiver tube should hang down roughly the same amount as the exhaust pipe tip, so you this is about as good as it gets for departure angle.

    Have any tips? Maybe a better way of doing this? Comment below!

  • 3rd Gen Montero Seat Upholstery Repair Guide

    3rd Gen Montero Seat Upholstery Repair Guide

    Third generation Mitsubishi Montero/Pajero models with leather seats have a very common wear point: the left side of the driver’s seat. Every Montero I’ve seen either has a tear in that spot or has already had it repaired. Professional reupholstery will look fantastic, but costs hundreds of dollars. In this guide, I’ll explain how you can repair this common tear on a budget.

    Montero Seat
    Montero seat upholstery repair

    Supplies

    To perform this repair, you will need the following:

    For the new vinyl (or “pleather”), I recommend going to a local fabric store. Take off your headrest and bring it with you inside the store, so you can find vinyl that matches well. You can order vinyl online, but you’ll spend more money and it will be much harder to find a good match.

    Buy a lot more vinyl than you actually need. If it comes in yard-wide rolls, then buy at least a foot in length. This will give you lots of material to work with if you mess things up and should still cost less than $10.

    Preparation

    As you can see in the photos, I did my repair with the seat out of the vehicle. I did that because I bought an entirely new seat from a pick-and-pull junk yard and hadn’t yet installed it. You do not need to remove your seat to do this, though it may make it slightly easier to work with. If you do remove the seat, it is just four bolts/nuts and the power seat connections holding it in place.

    Start by using a diluted degreaser and a clean towel to thoroughly clean the upholstery around the tear. You need to remove all of the dirt and grime in order for the vinyl adhesive to stick well later.

    If there is any lose, crumbling foam padding, then you should remove the bits that are coming off. The idea is to get a clean starting point.

    Cut a clean rectangle around the tear, then remove lose/crumbling foam.

    In that same vein, use your scissors or knife to cut a rectangle around the tear. You want straight, clean edges instead of the jagged natural tear. Don’t remove more material than necessary. Just enough that you have a straight-edged rectangle.

    The repair

    Using your new vinyl material, cut two rectangles of material. The first (inner) rectangle should be about an inch larger than the opening on the seat, on all sides. That inch will give you plenty of surface area for the glue.

    Your second (outer) rectangle of new material will probably be a little larger than that. This is what will be visible, so try to make it so the edges will line up with seams in the original upholstery. As you can see, my outer rectangle isn’t actually a rectangle at all. The bottom edge has a substantial curve to it. That was to hide the edges as much as possible.

    Get your glue ready, then carefully put the inner rectangle inside the seat (under the original upholstery). Smooth it out as much as you can, so it isn’t bunching up. Then apply glue to that inch overlap. You don’t need a lot of glue, but enough that the whole overlapping surface gets coverage.

    While the glue is still wet, adjust the new material placement if necessary. Avoid getting any glue on the outer surfaces of the upholstery. Give the glue 20-30 minutes to set.

    After gluing the new inner vinyl in place, make sure your new outer vinyl will line up well

    Double-check to make sure your outer patch material will lay nicely, then cover its back side with a thin layer of glue. Immediately place the patch over both the original upholstery and the new inner material. As the glue dries, smooth out the outer patch so there are no wrinkles.

    Make sure all edges of the new vinyl are firmly glued down. Excess glue won’t be very visible after drying, but try to keep it to a minimum.

    When that glue dries, go back and makes sure all of the edges of the outer patch are flush and that you don’t have any edges pulling up. If you do, use a small amount of glue to keep the outer edges done.

    That’s it!

    Finished upholstery repair

    As you can see, mine turned out pretty well. It is visible, but it is only noticeable if you are looking for it. Even when you do see it, it looks decent.

    I’ve had mine done for a few weeks now and haven’t noticed any issues. It hasn’t peeled or anything.

    This is a cheap repair, but it still looks a million times better than a tear with foam visible.

  • Multi-Material Resin 3D Printing Tutorial

    Multi-Material Resin 3D Printing Tutorial

    I recently wrote a how-to guide on multi-color resin 3D printing. As soon as I saw that that technique was a success, I knew I wanted to try it with different material types as well.

    There are several kinds of photosensitive resin available for 3D printing, which mimic different kinds of engineering plastics. For instance, you might have seen some labeled as “ABS-like.” But for this proof of concept, I wanted wildly different kinds of resins, so I chose a flexible resin and a standard rigid resin.

    Supplies

    You can use pretty much any rigid resin you like, but the stuff linked above is what I used here. There aren’t as many flexible resin options on the market. Siraya Tech’s Tenacious is probably the most well-known, but I used 3DMaterials’ SuperFast SuperFlex resin and was very impressed with it. It printed well on my ELEGOO Saturn 2 and was quite flexible.

    The idea

    As with the multi-color resin 3D printing technique, the idea here is to print an object in your primary material first. In my case, that was the flexible resin. That object should have modeled-in cavities that you can then fill with your secondary resin (the rigid resin).

    When you shine a 405nm UV flashlight on the liquid resin you just poured in, it will cure and harden. It will also fuse to the original print. Theoretically, you could fill several different cavities with different resin colors and materials. The result is a multi-material print.

    Multi-material resin 3D printing
    Multi-material resin 3D printing

    Obviously, this does have some restrictions. Namely, your model needs to have accessible cavities for your secondary resin. This will limit the geometry you can print, but I think this technique could still be very useful.

    The steps

    My original guide on multi-color resin 3D printing goes into far more detail on each step, but I’ll cover the basics again here.

    First, print your object using flexible filament.

    Then, using a blunt syringe, fill the cavities with your rigid filament.

    Use the UV flashlight to cure the new resin.

    Refill and cure again until the cavities are full.

    That’s it!