
With filament-based 3D printing, you can get multiple colors with additional extruders, manually swapping filament, or with something like a Mosaic Palette device. But one of the disadvantages of resin 3D printing is that it is very difficult to change colors during a print.
In this article, I’ll walk you through a technique that lets you get multiple colors in a resin print and that is easy to do. Redditor u/ChinchillaWafers suggested this technique in this post and I decided to give it a try. It worked quite well, so I’m sharing it with you all.
Supplies
To do this, you’ll need the following supplies in addition to your printer:
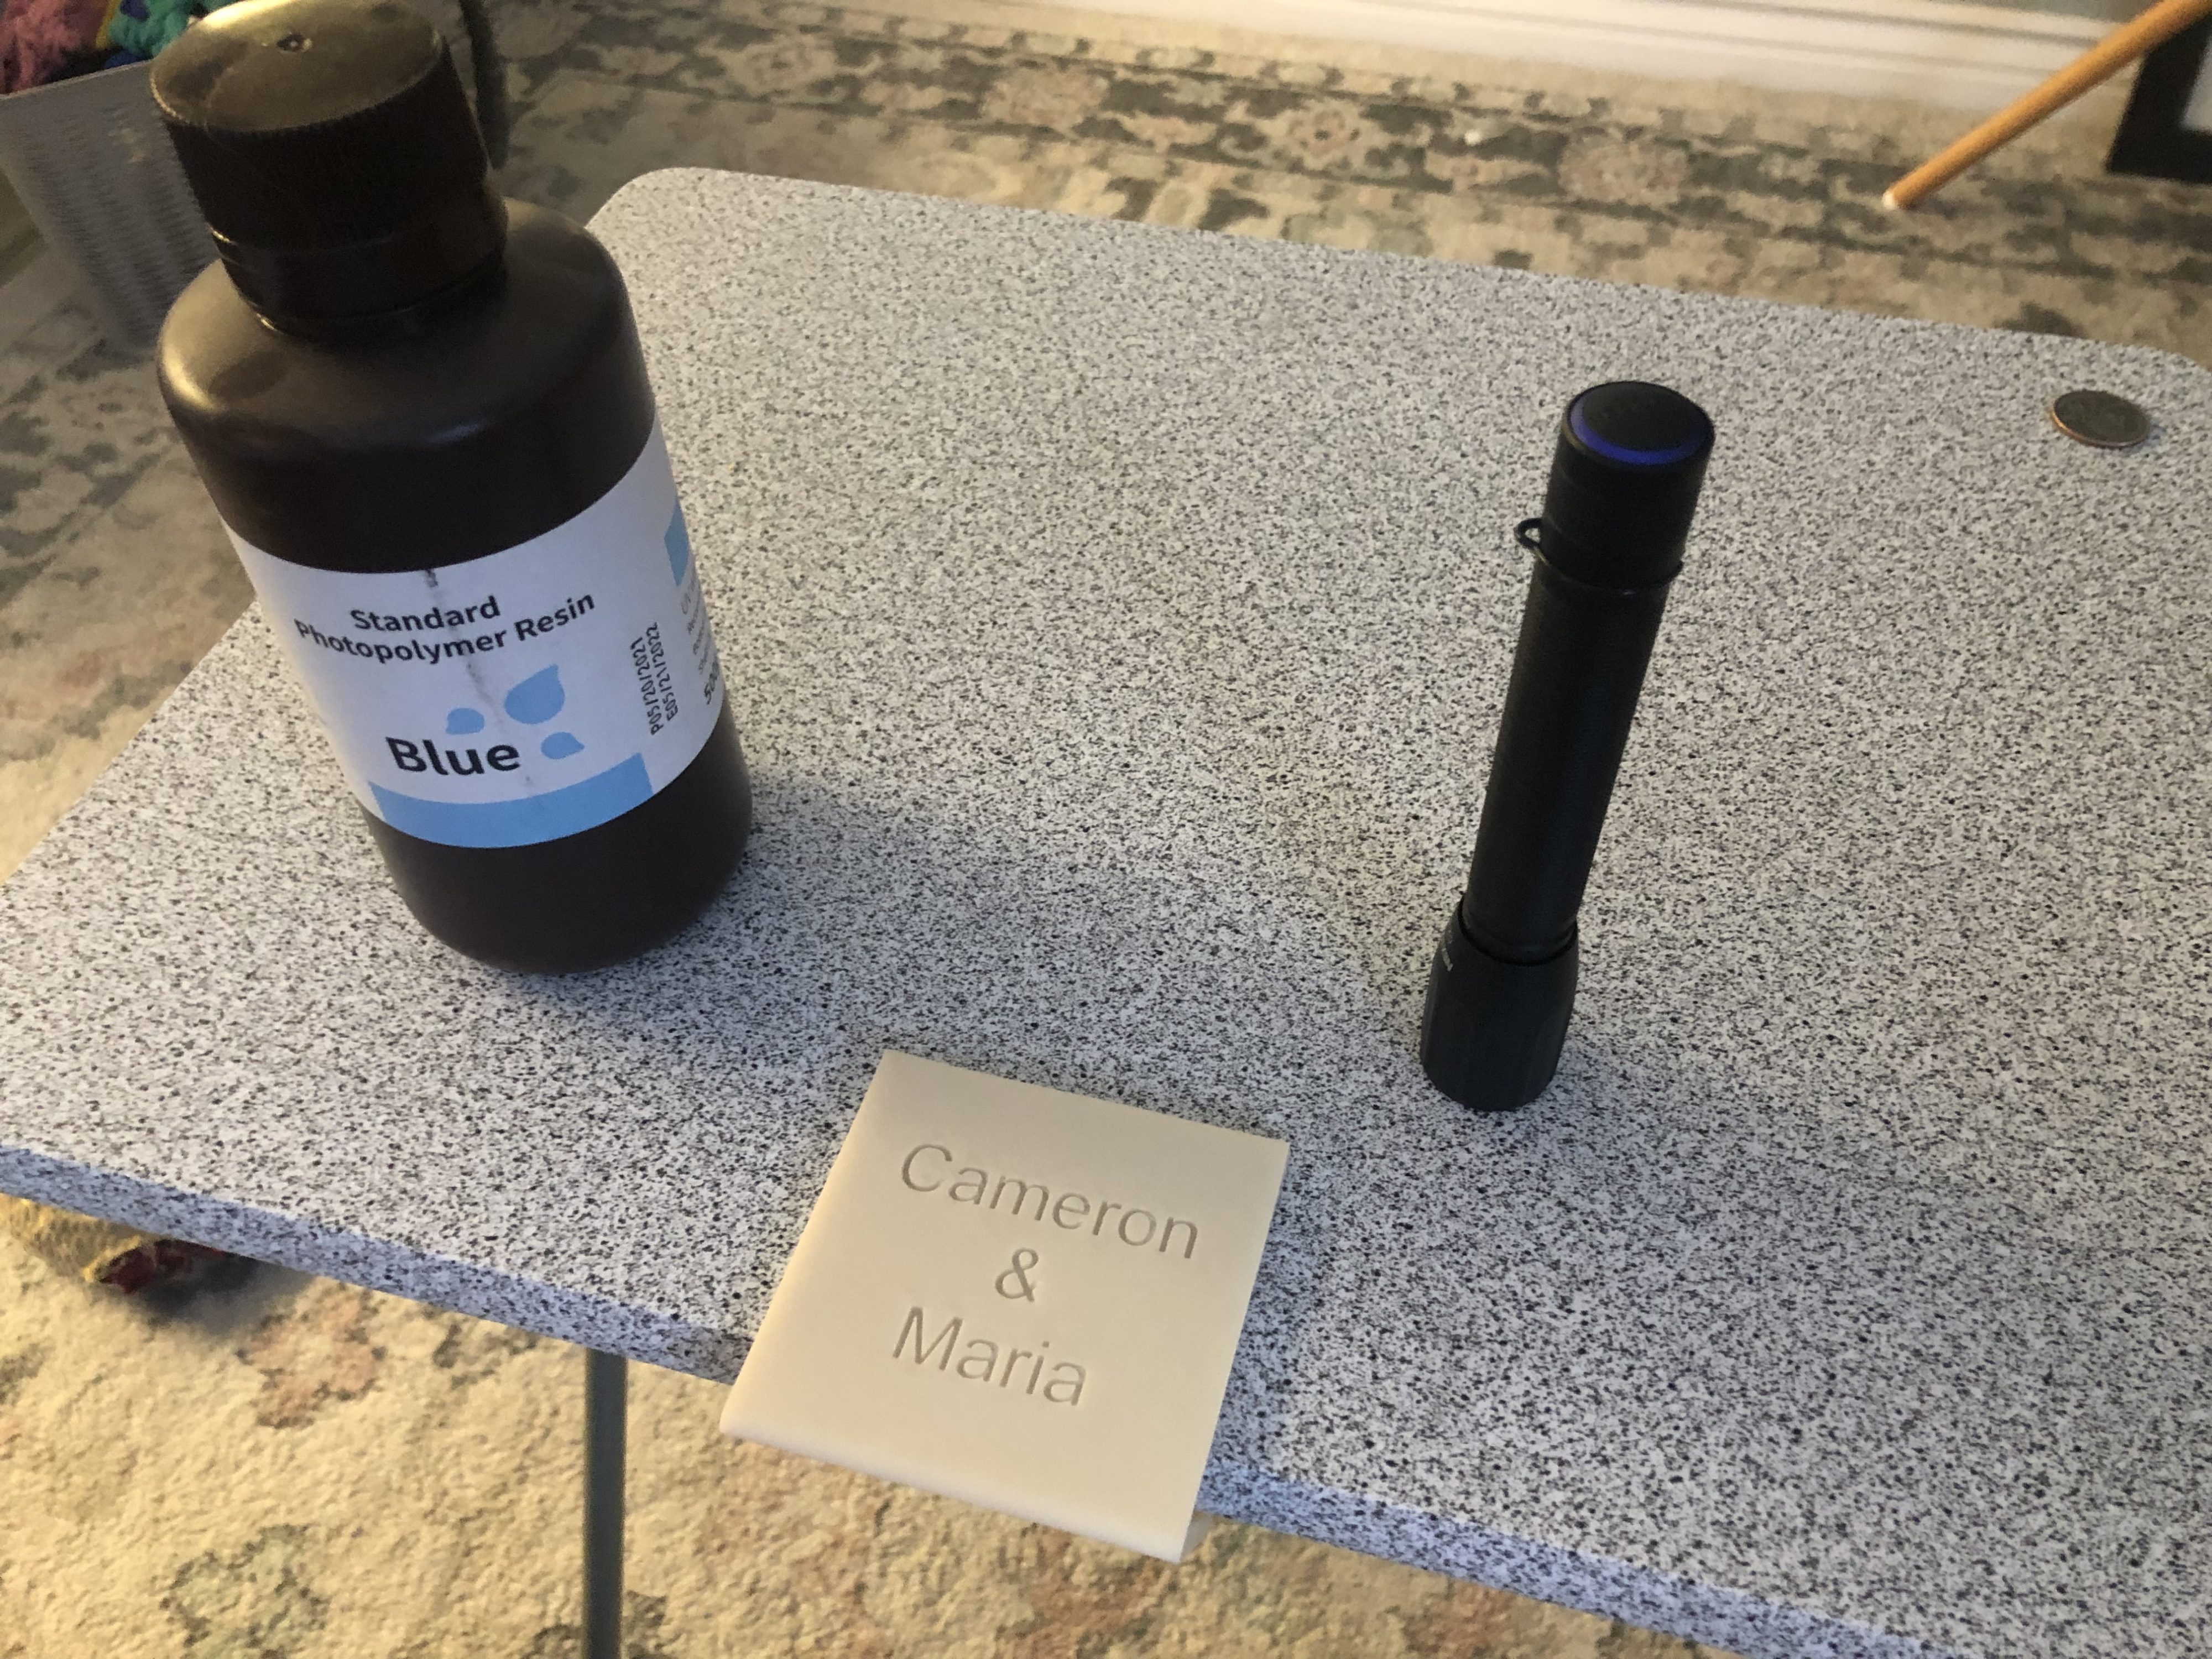
- Primary resin
- Contrasting resin(s)
- A 405nm UV flashlight
- Blunt-tip needle syringes
- Small, disposable containers for your contrasting resin
- IPA alcohol and paper towels
You can use as many resin colors as you like, but I suggest using colors that contrast well. Gray on white, for example, won’t show up very well. But black on white will.
The idea
The idea here is to leave debossed letters or other spaces in your printed model, such as text inset into a surface. You can then fill those with your contrasting liquid resin and use the UV flashlight to cure it.
A 405nm UV flashlight will cure liquid resin just like your MSLA resin 3D printer does. Other UV wavelengths might work, but these resins are meant to cure with 405nm, so it is best to stick to that.
Because you’re pouring liquid resin into cavities in your print, you need to make sure you model can be physically oriented so that those cavities are level. Otherwise, it will be hard to keep the resin from spilling over the edges before it cures and hardens.
The steps
Step 1:
Start by printing your model like you normally would. For my test, I printed a simple sign with debossed lettering that says “Cameron & Maria” (me and my girlfriend). I printed this in white so that most other colors would contrast well.
Step 2:
Remove supports, then rinse and cure your part. You can also finish curing the part after adding the contrasting resin, but I chose to cure it first since I would be handling the part.
Step 3:
After putting on gloves, choose a contrasting resin color (or multiple colors) and pour it into a small, disposable container. Paint cups work well for this. You could try to pull the resin directly from the bottle, but it would be difficult to reach your syringe inside.
Step 4:
Make sure your print is level, then carefully fill a syringe with contrasting resin. Try to pick a syringe needle size that is a bit smaller than the smallest portion of the debossed letters.
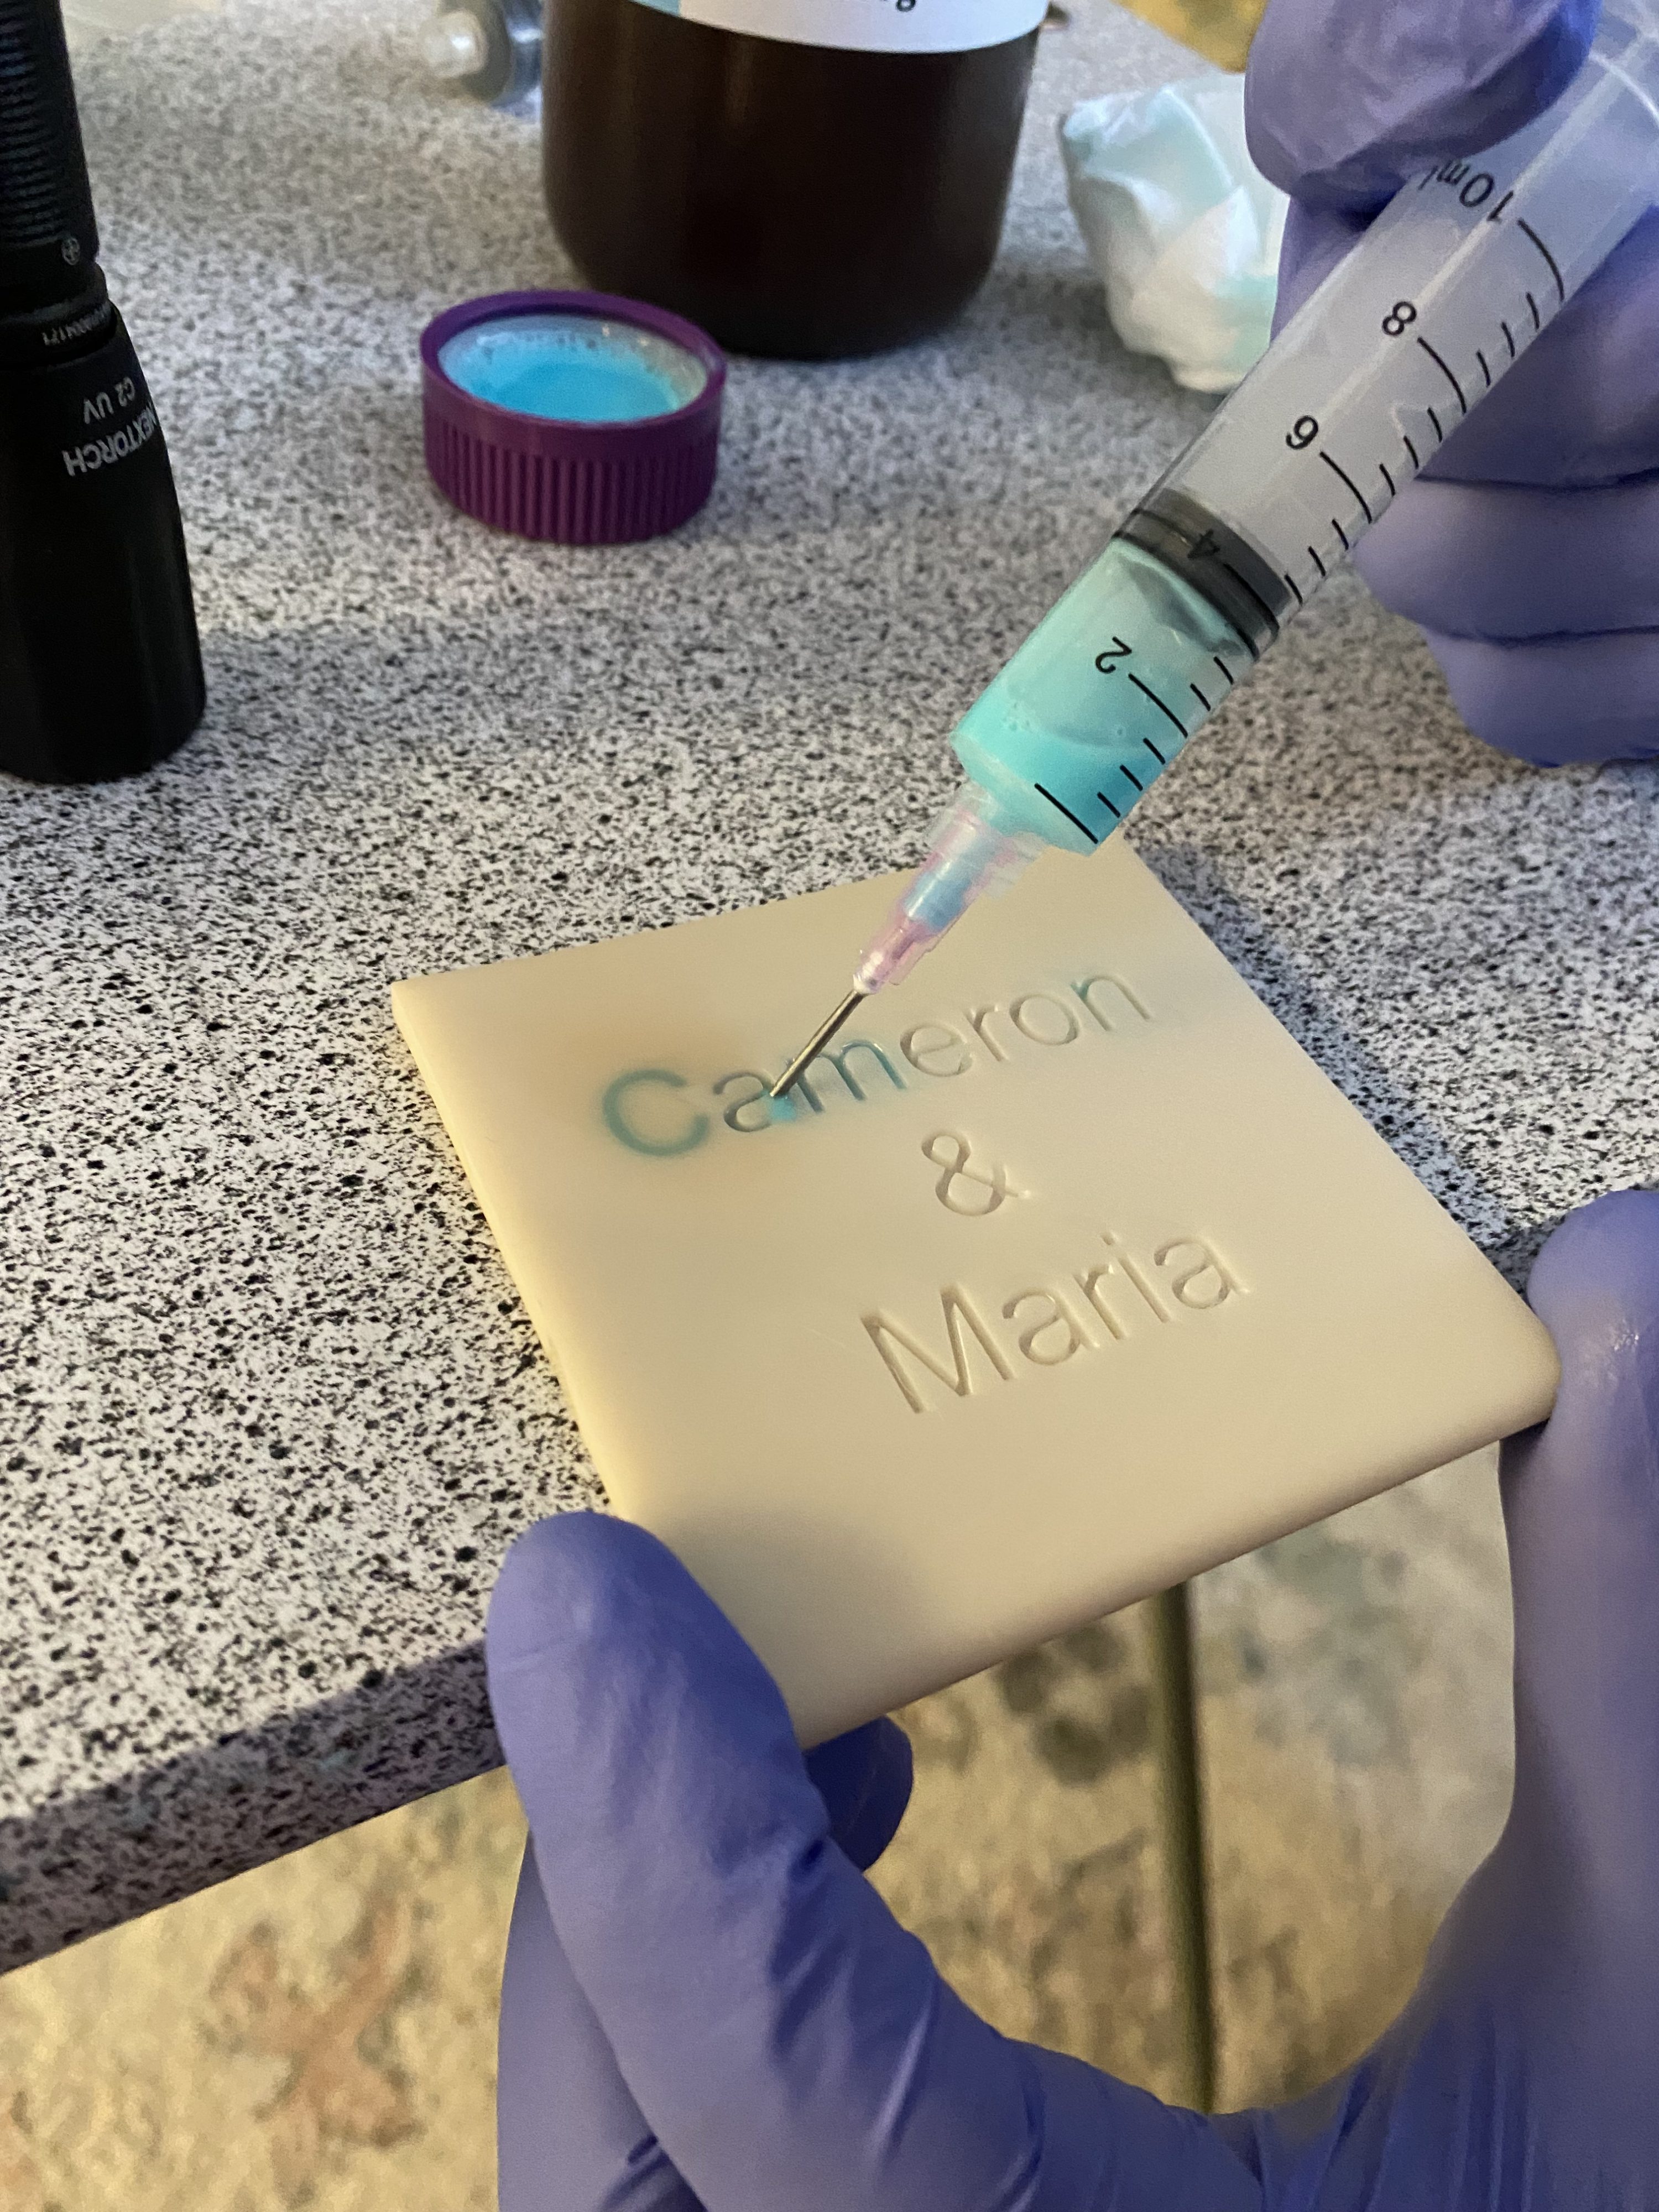
Then very slowly squeeze the syringe to fill your letters with the contrasting resin. You can either do all of your letters at once or do them one at a time (curing each before starting the next).
I recommend doing them all at once in order to avoid yellowing the original print with too much UV exposure. You can see at the top left (by the “C”) that I made that mistake when I first started.
Step 5:
If any resin spilled over the edges, use an paper towel wetted with IPA to wipe it away. Try not to soak up the resin inside the lettering.
Step 6:
Turn on your UV flashlight and shine it over the lettering to cure the new resin. Depending on the depth of the lettering (mine was 2mm), curing can take anywhere from 3-15 seconds.

Safety warning: 405nm UV light is bad for you! Avoid shining it at anything living, especially your eyes! Seriously, I take no responsibility if you blind yourself or develop skin cancer.
Step 7:
Repeat steps 4-6 until your letters are completely filled in. If you end up with spilled-over resin that cured, you can lightly sand the surface to remove it.
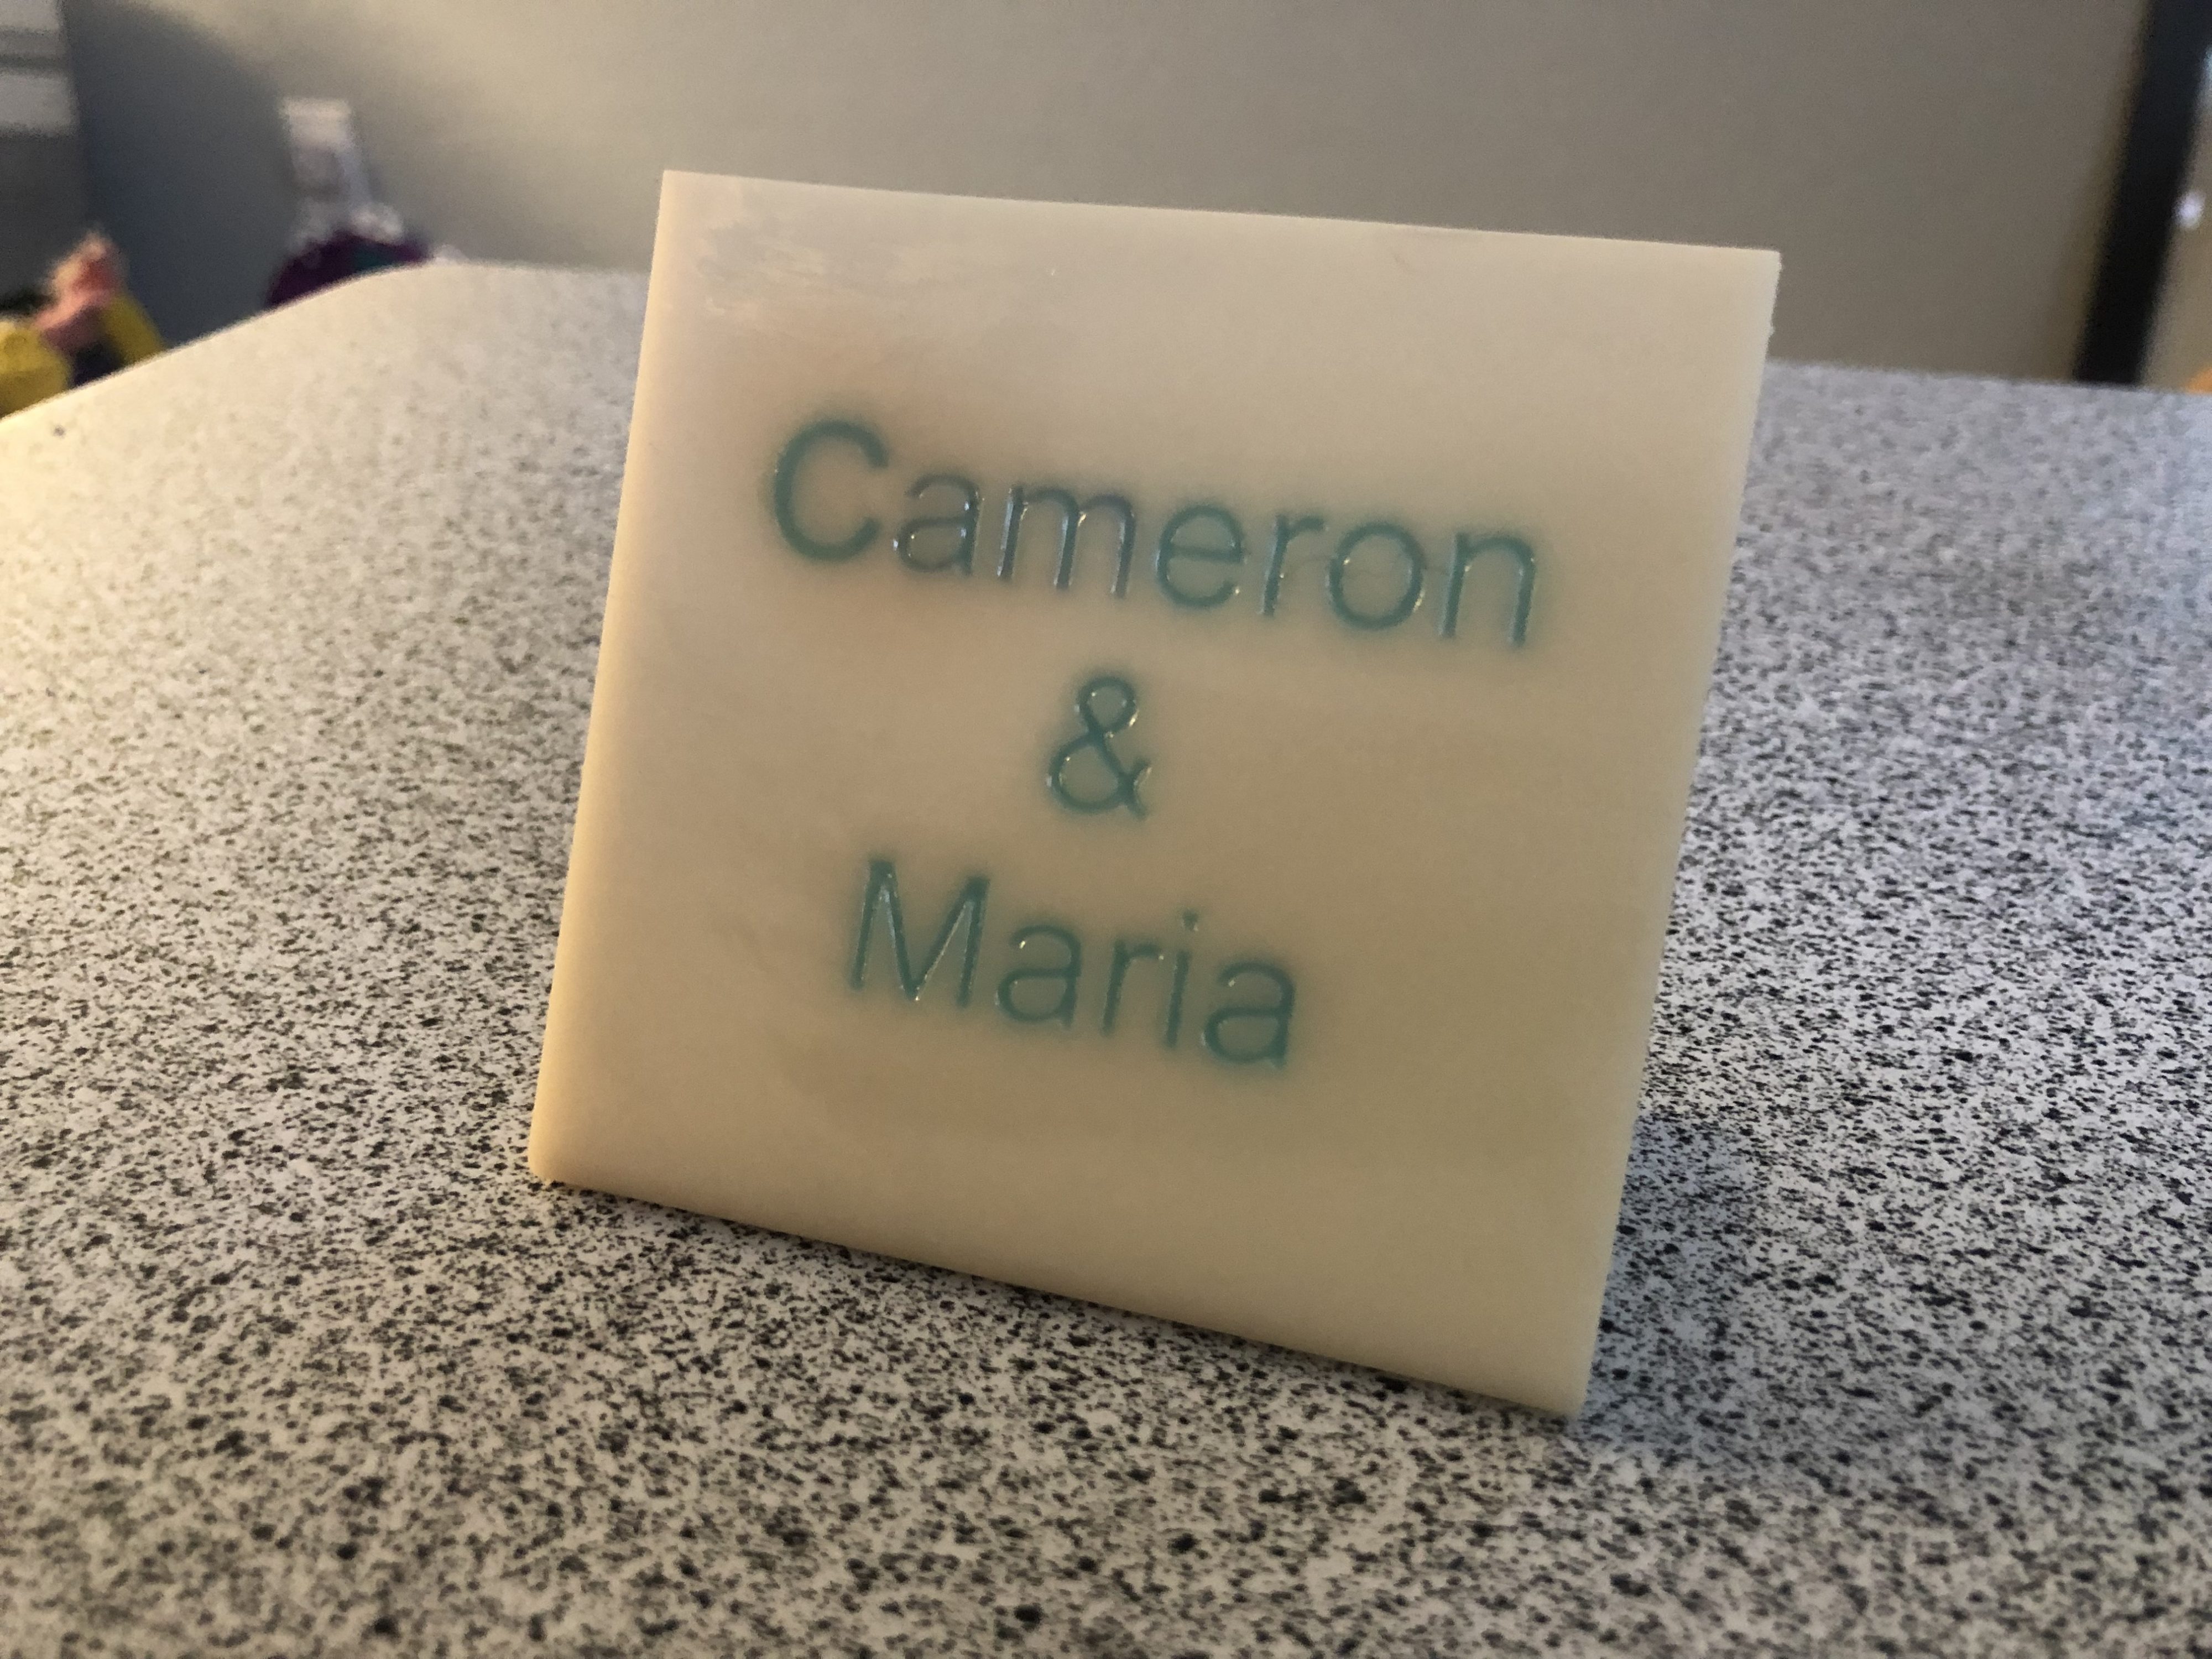
Admire your work
And that’s it, you’re done! This is an easy, affordable way to add more color to your resin prints. It works especially well for debossed lettering, so I will almost certainly use it in the future for projects where I want to add a name/logo to enclosures.
It seems like it might also be possible to mix materials, such as a flexible resin with a rigid resin. I’m hoping to experiment with that in the future.
Leave a Reply