I recently wrote a how-to guide on multi-color resin 3D printing. As soon as I saw that that technique was a success, I knew I wanted to try it with different material types as well.
There are several kinds of photosensitive resin available for 3D printing, which mimic different kinds of engineering plastics. For instance, you might have seen some labeled as “ABS-like.” But for this proof of concept, I wanted wildly different kinds of resins, so I chose a flexible resin and a standard rigid resin.
Supplies
- Flexible resin
- Rigid resin
- A 405nm UV flashlight
- Blunt-tip needle syringes
- Small, disposable containers for your contrasting resin
- IPA alcohol and paper towels
You can use pretty much any rigid resin you like, but the stuff linked above is what I used here. There aren’t as many flexible resin options on the market. Siraya Tech’s Tenacious is probably the most well-known, but I used 3DMaterials’ SuperFast SuperFlex resin and was very impressed with it. It printed well on my ELEGOO Saturn 2 and was quite flexible.
The idea
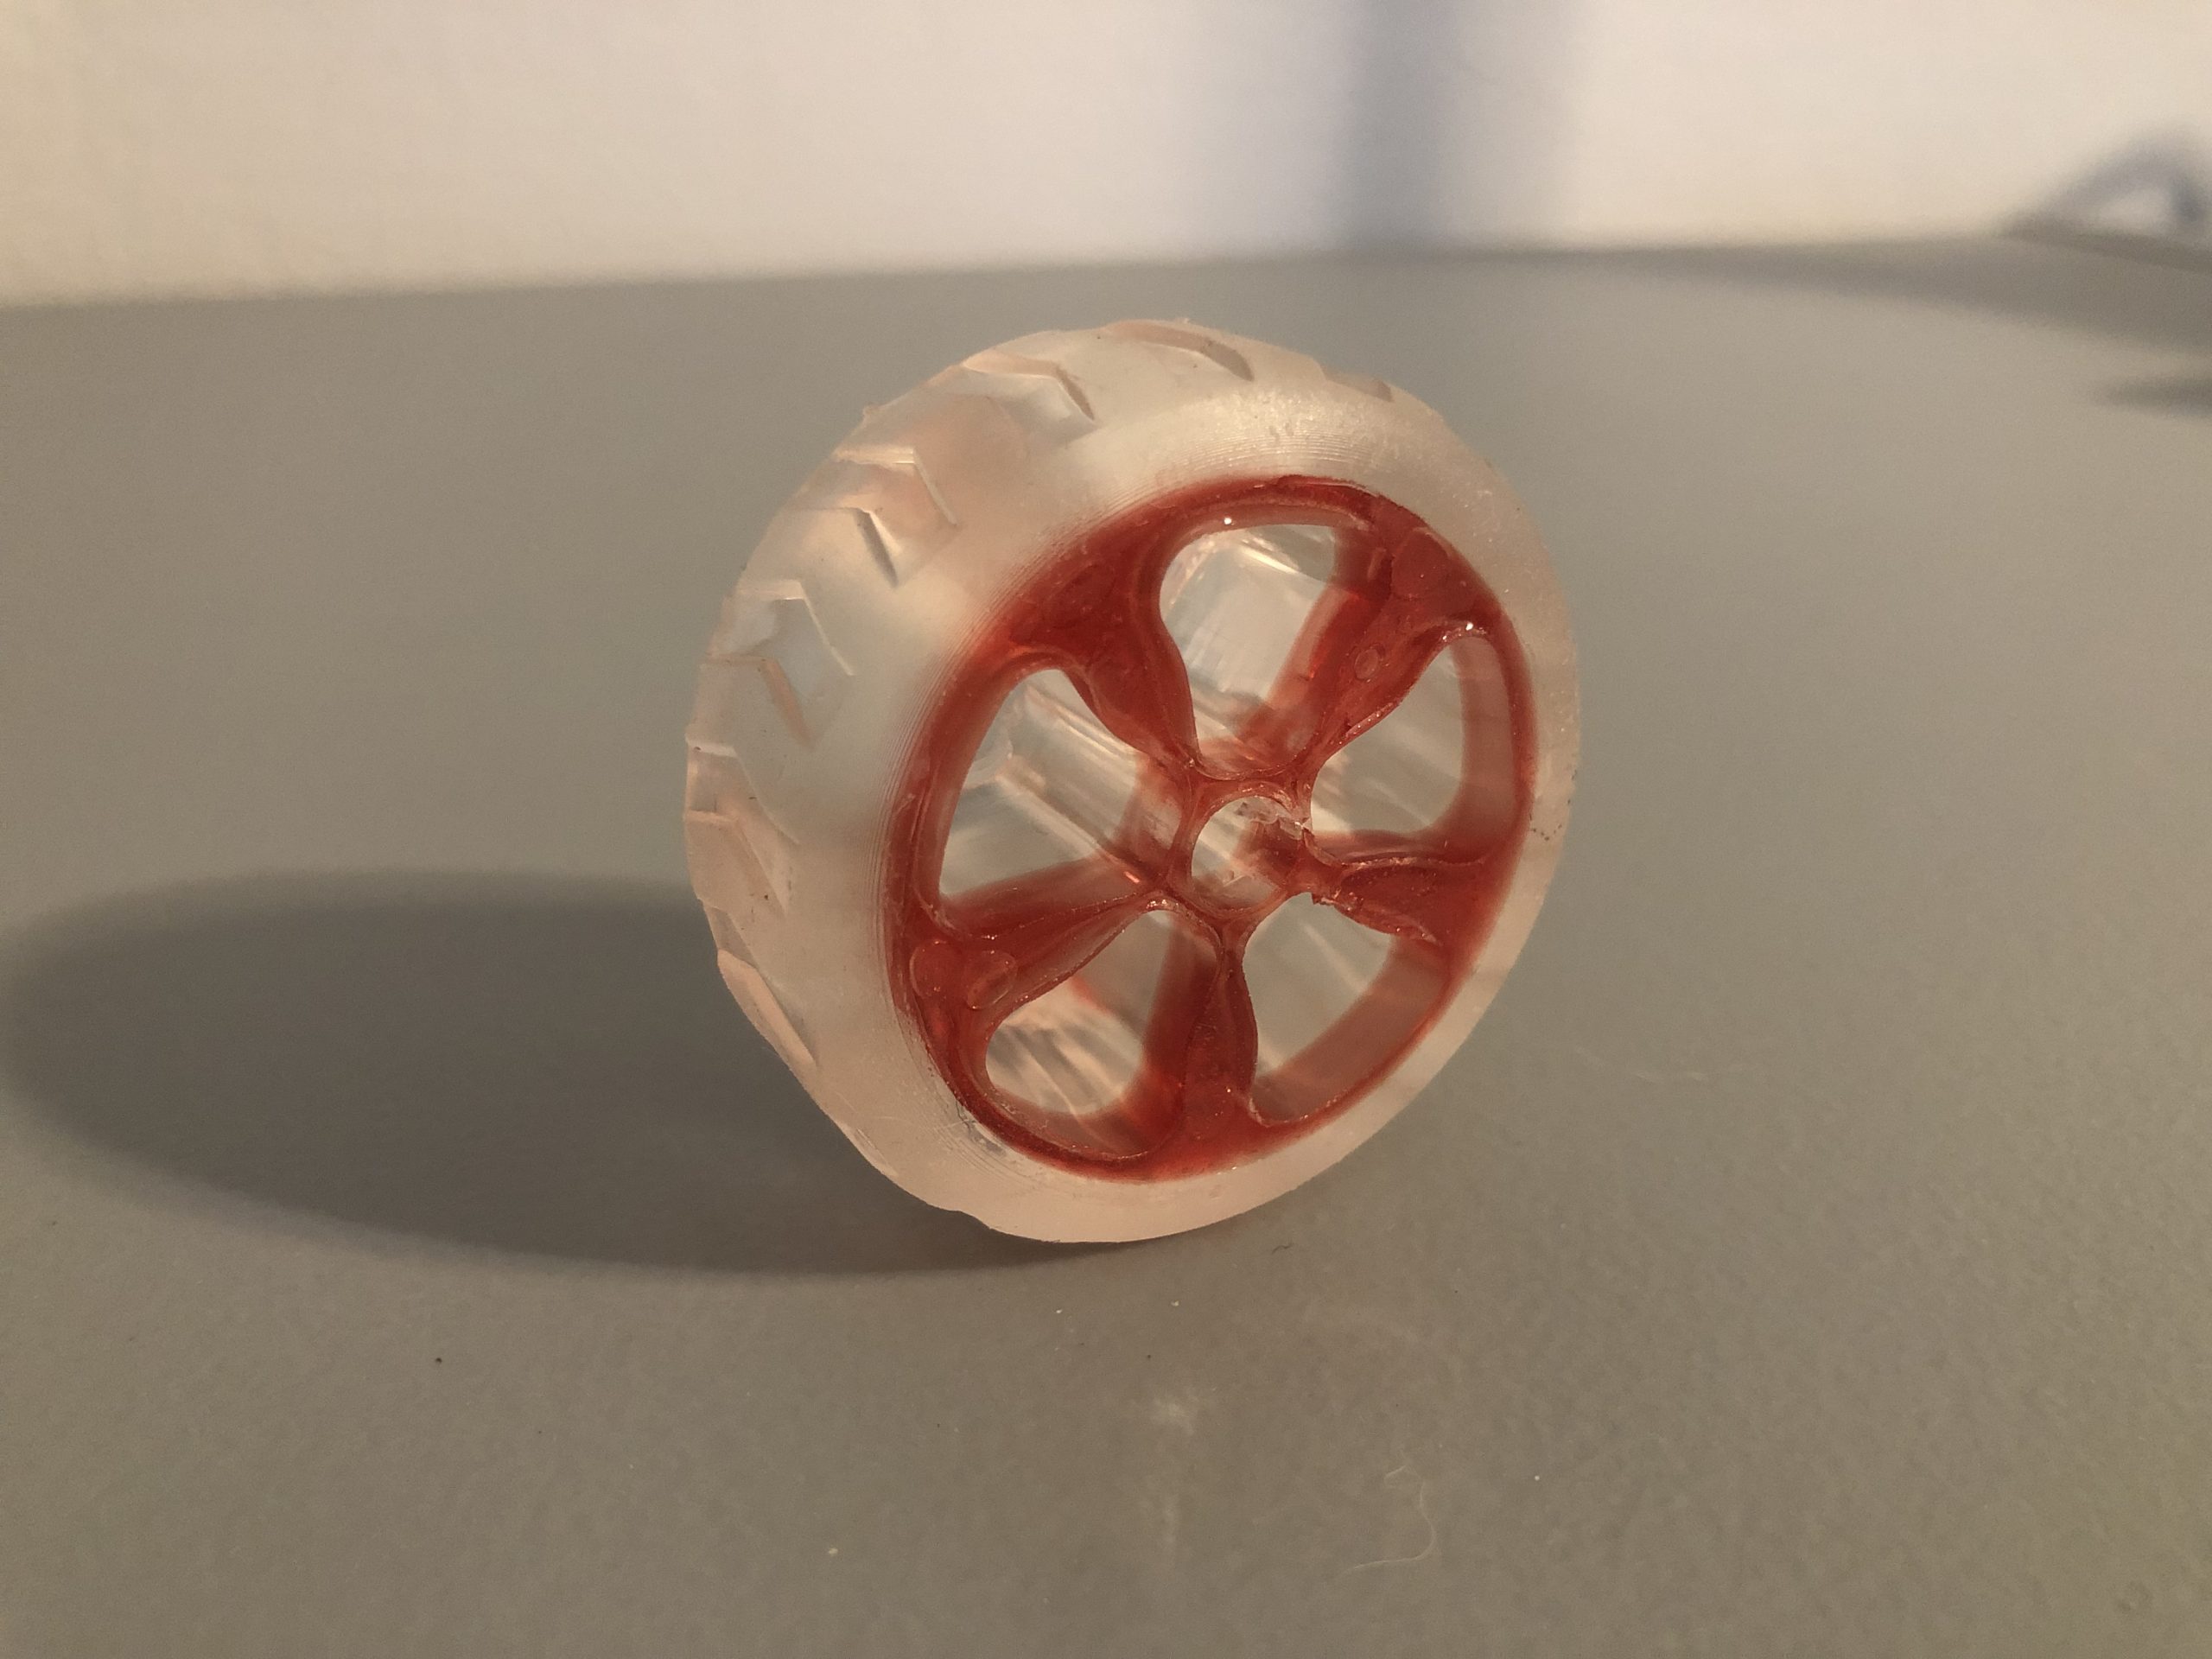
As with the multi-color resin 3D printing technique, the idea here is to print an object in your primary material first. In my case, that was the flexible resin. That object should have modeled-in cavities that you can then fill with your secondary resin (the rigid resin).
When you shine a 405nm UV flashlight on the liquid resin you just poured in, it will cure and harden. It will also fuse to the original print. Theoretically, you could fill several different cavities with different resin colors and materials. The result is a multi-material print.
Obviously, this does have some restrictions. Namely, your model needs to have accessible cavities for your secondary resin. This will limit the geometry you can print, but I think this technique could still be very useful.
The steps
My original guide on multi-color resin 3D printing goes into far more detail on each step, but I’ll cover the basics again here.
First, print your object using flexible filament.
Then, using a blunt syringe, fill the cavities with your rigid filament.
Use the UV flashlight to cure the new resin.
Refill and cure again until the cavities are full.
That’s it!
Leave a Reply